# App Push Configuration
Please purchase BeikeShop APP (opens new window) first. Then follow the tutorial steps to apply for the Push App URL.
# Enable Push Service
- Visit Quick Start (opens new window). Please complete Step 1 (Enable) and Step 2 (Configuration) according to the documentation. This is a prerequisite, please make sure to complete it.
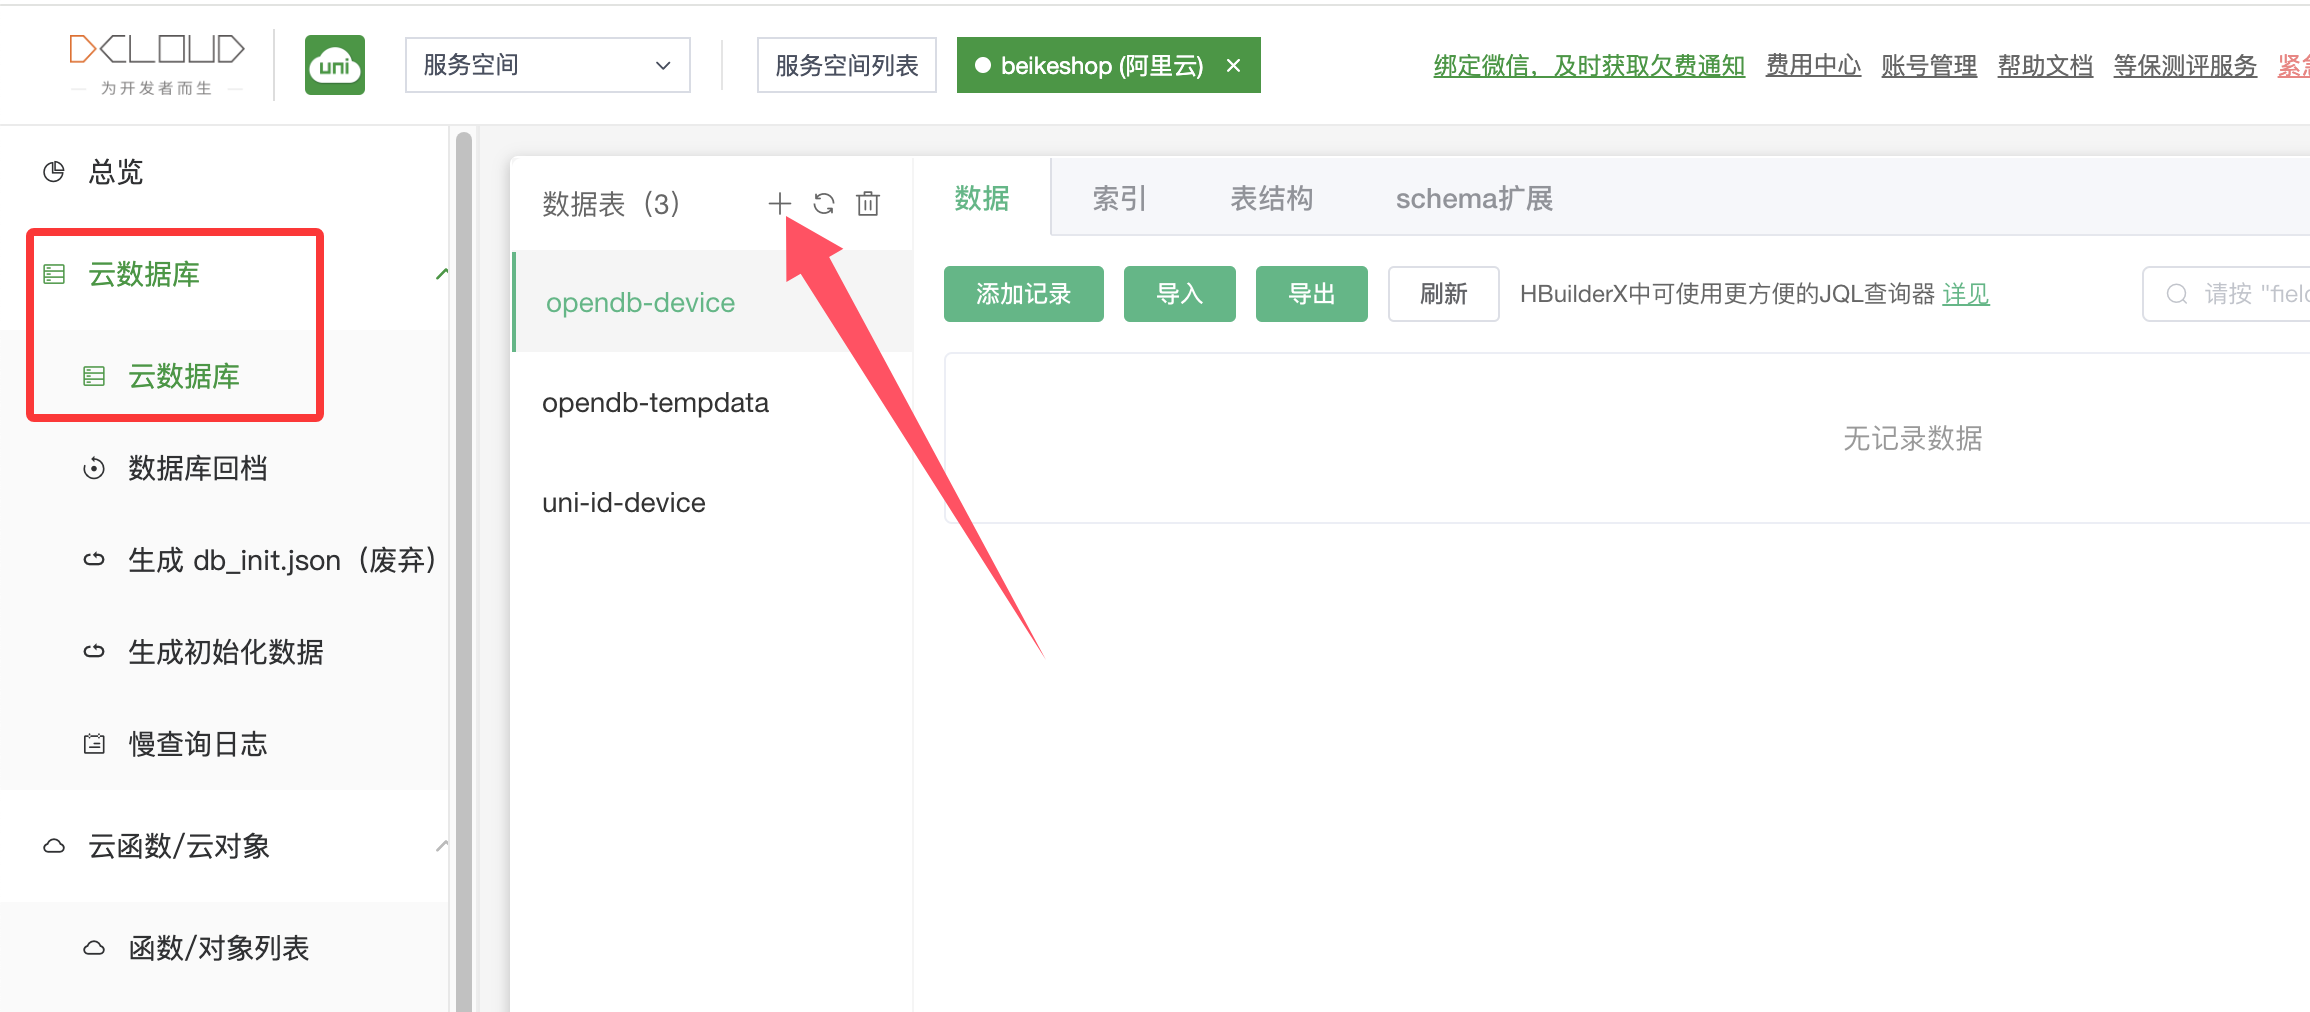
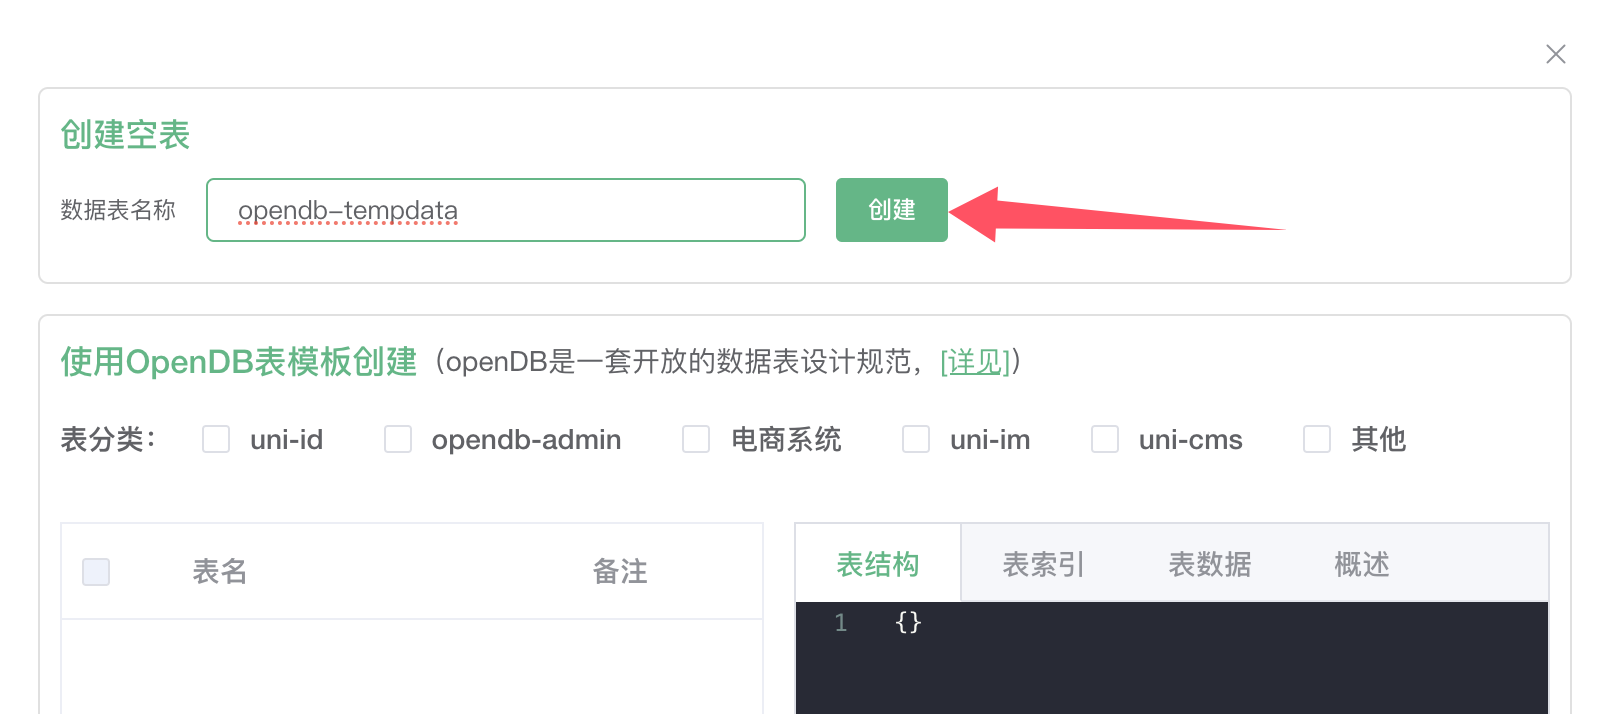
Note: After enabling the cloud space, you need to enter the cloud space -> Cloud Database, and create three opendb tables required by the extension library: opendb-tempdata, opendb-device, uni-id-device.
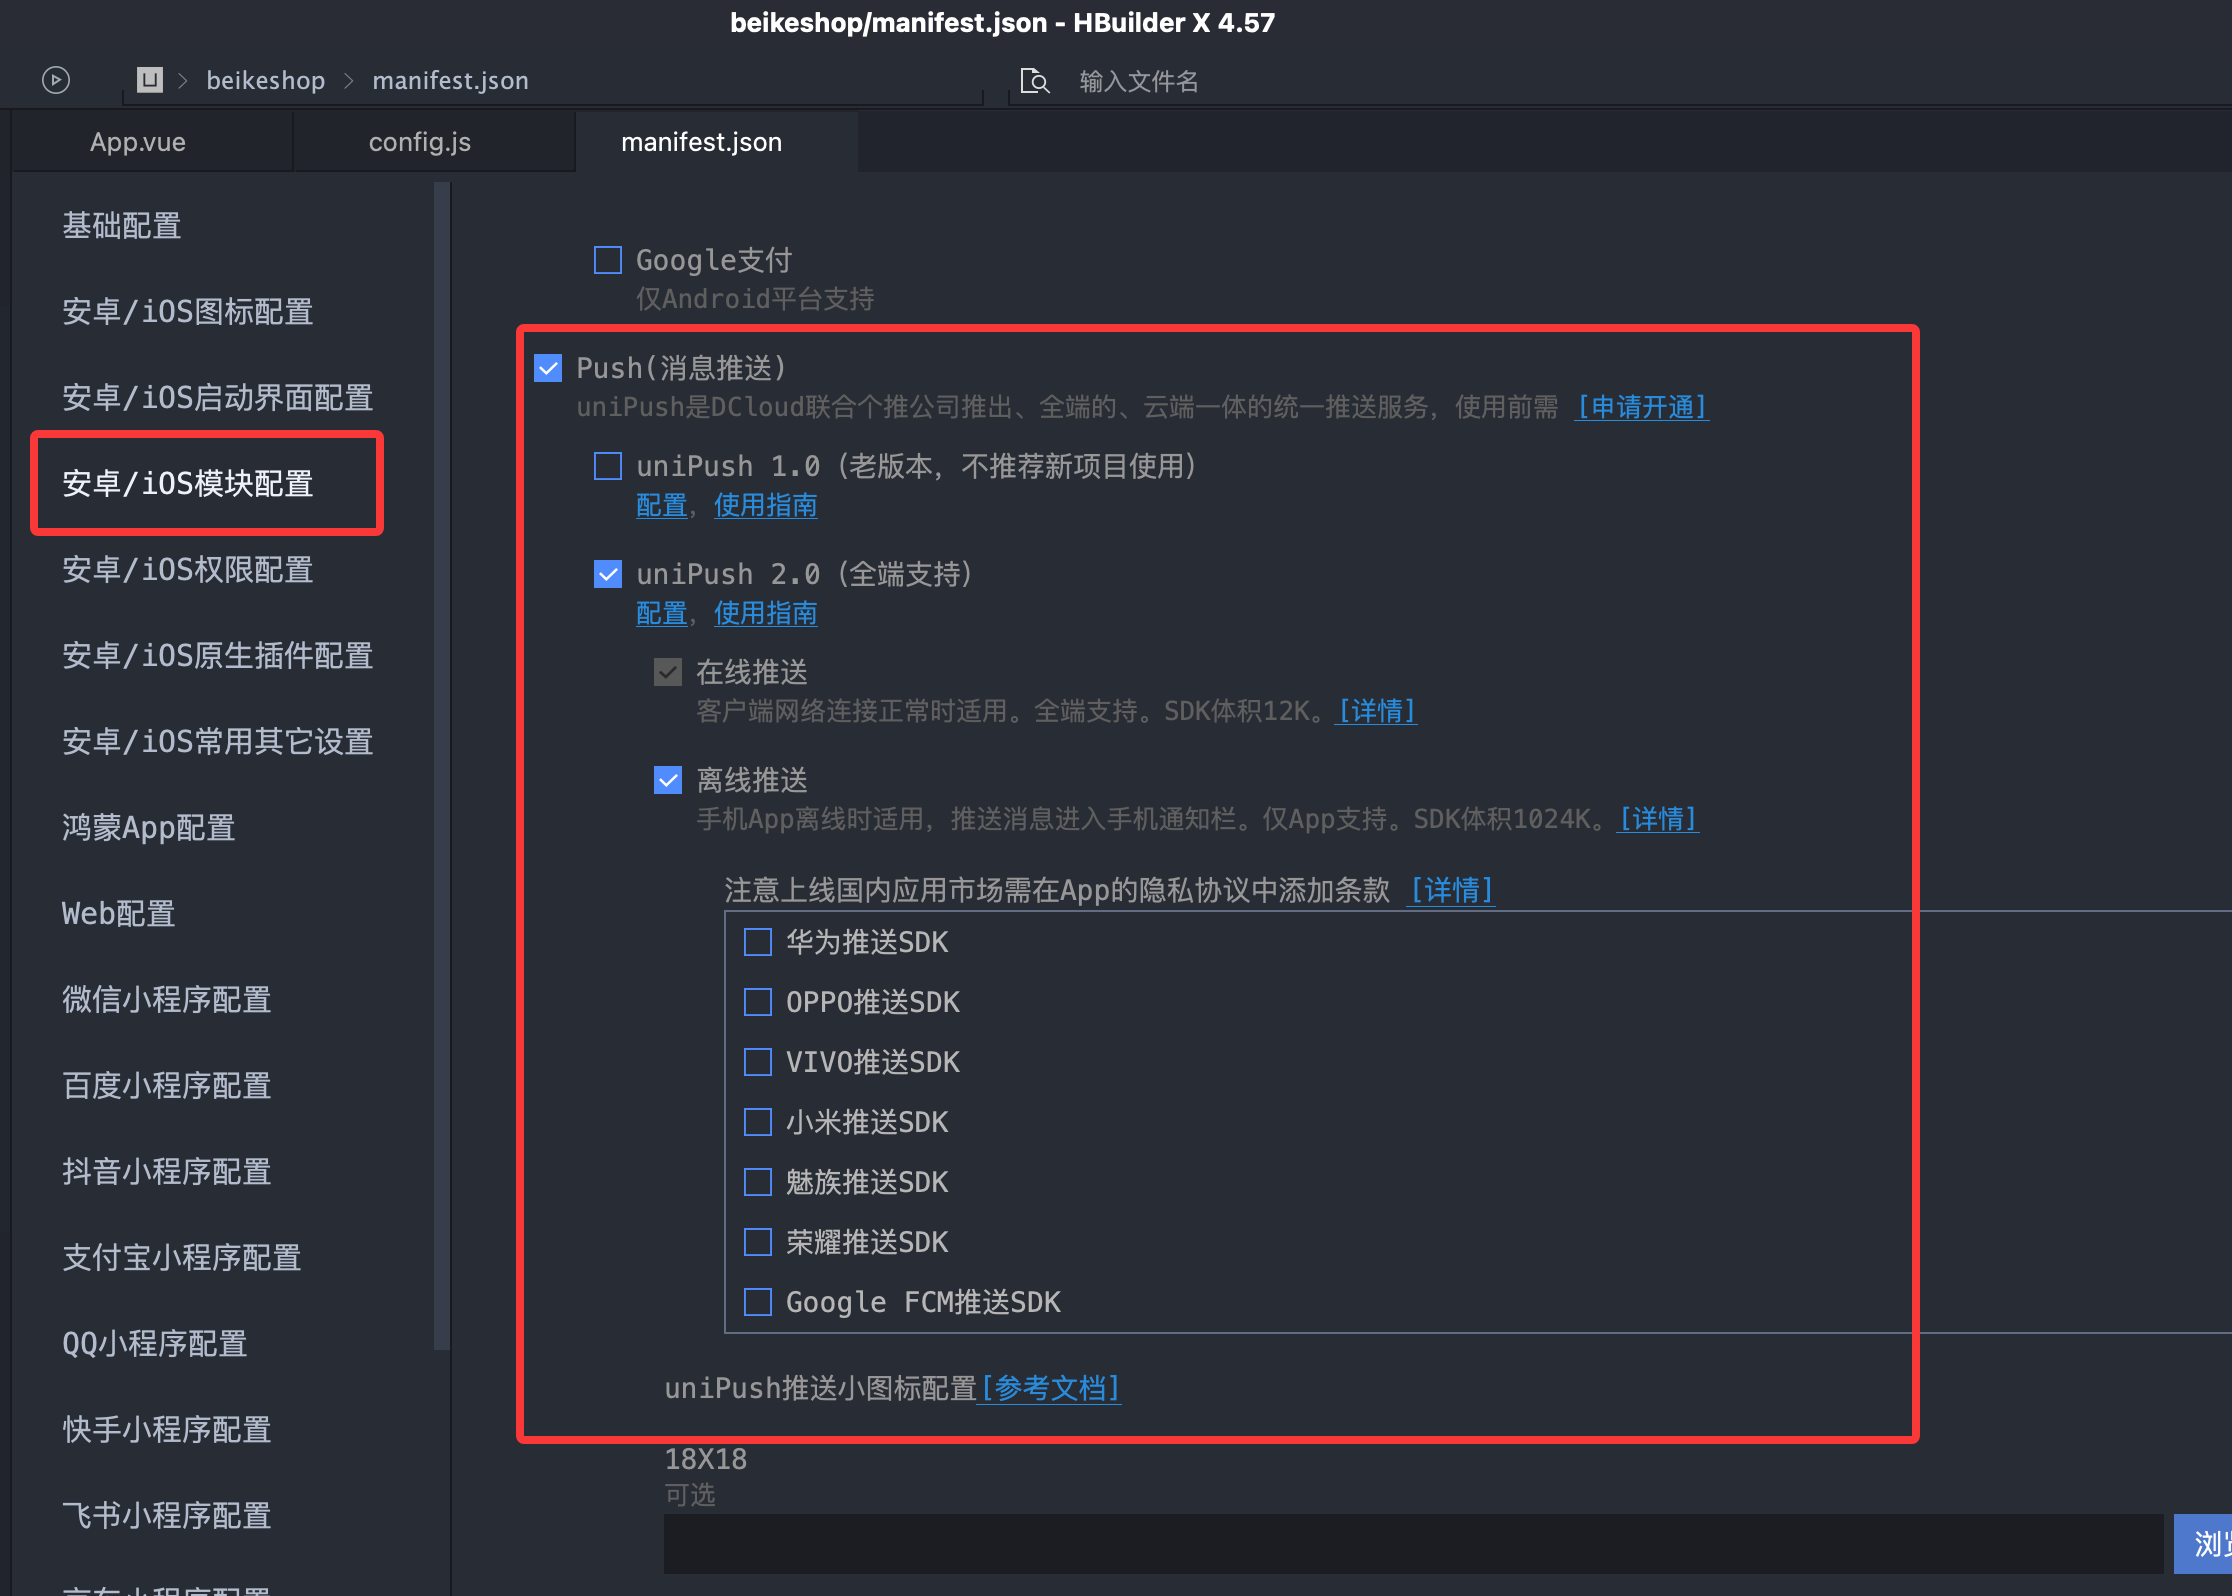
Open the BeikeShop APP project with HBuilderX, click on the manifest.json file, and in the left-side "Android/iOS Module Configuration" Push (Message Push), check uniPush 2.0. In the offline push section, check the corresponding platform according to your needs.
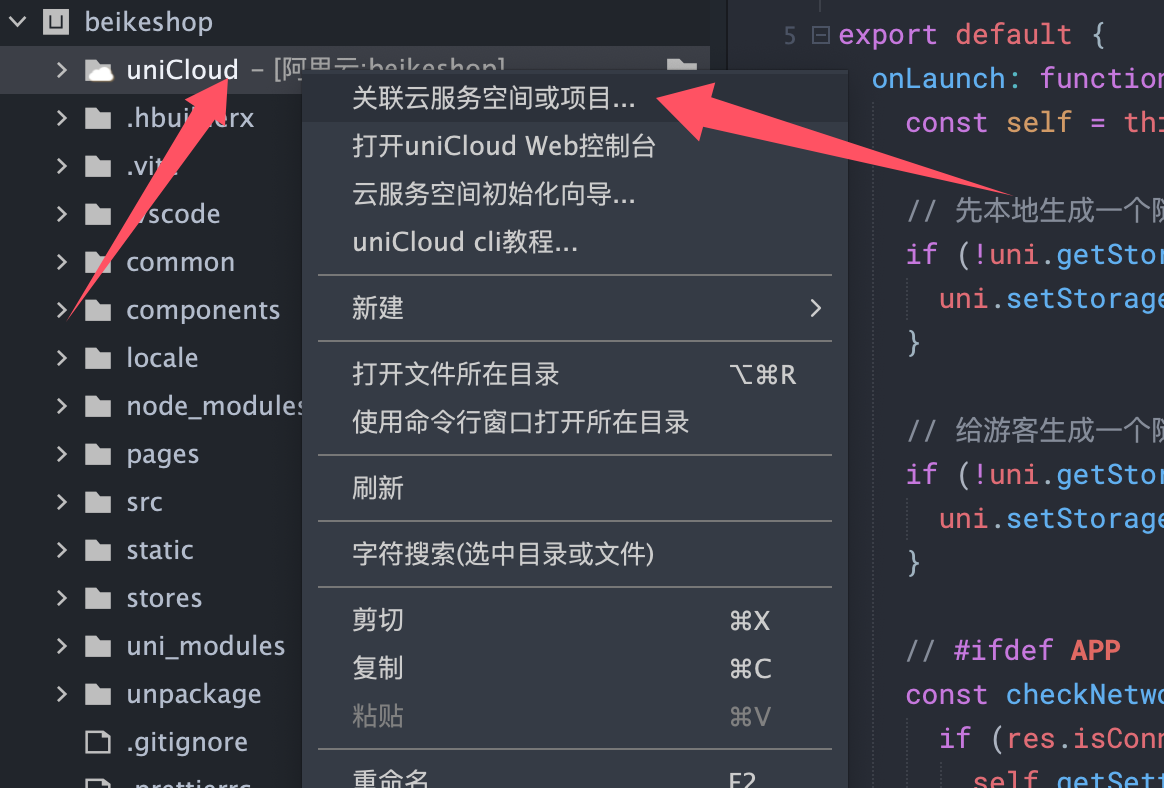
Right-click on uniCloud and select "Associate Cloud Service Space or Project"
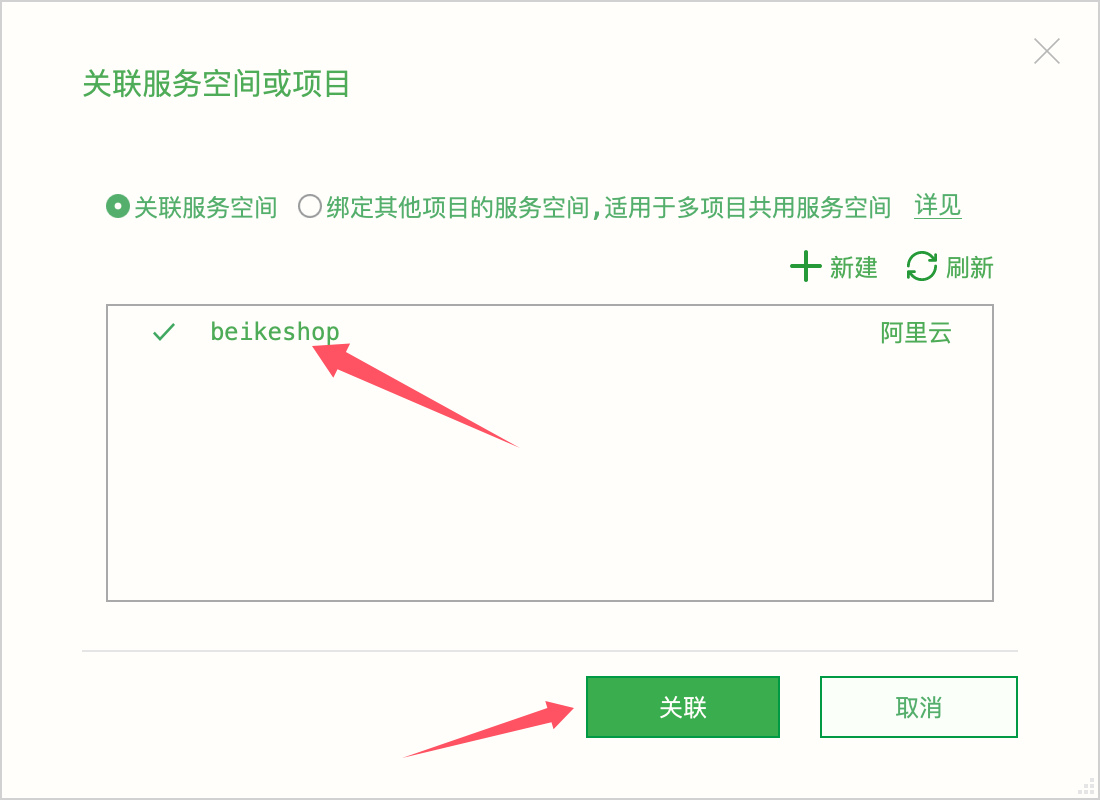
In the opened window, select the cloud service space you enabled in Step 1, and click Associate
Open the path uniCloud/cloudfunctions/unipush, right-click on unipush, and select "Upload Deployment"

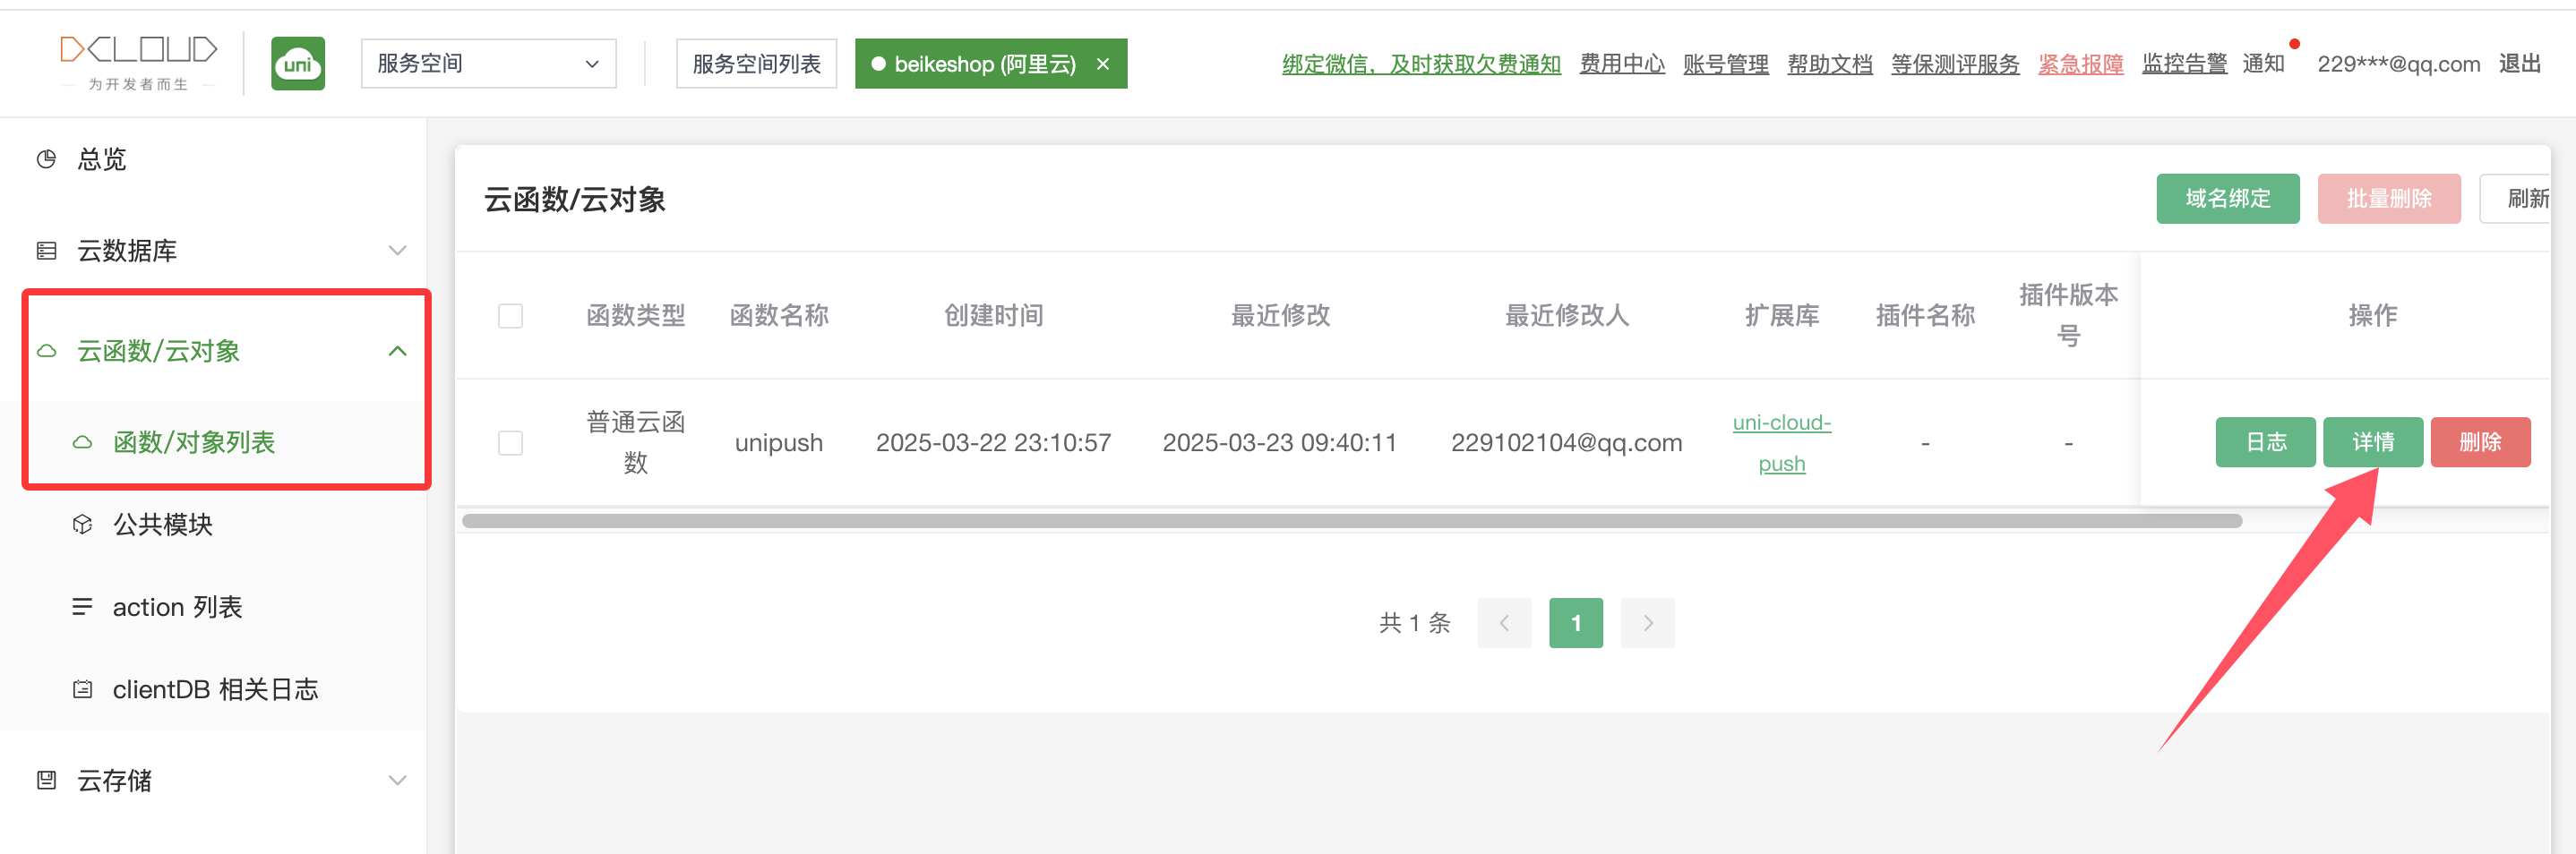
After uploading and deploying unipush, open Cloud Space -> Cloud Functions/Cloud Objects -> Function/Object List, and click Details
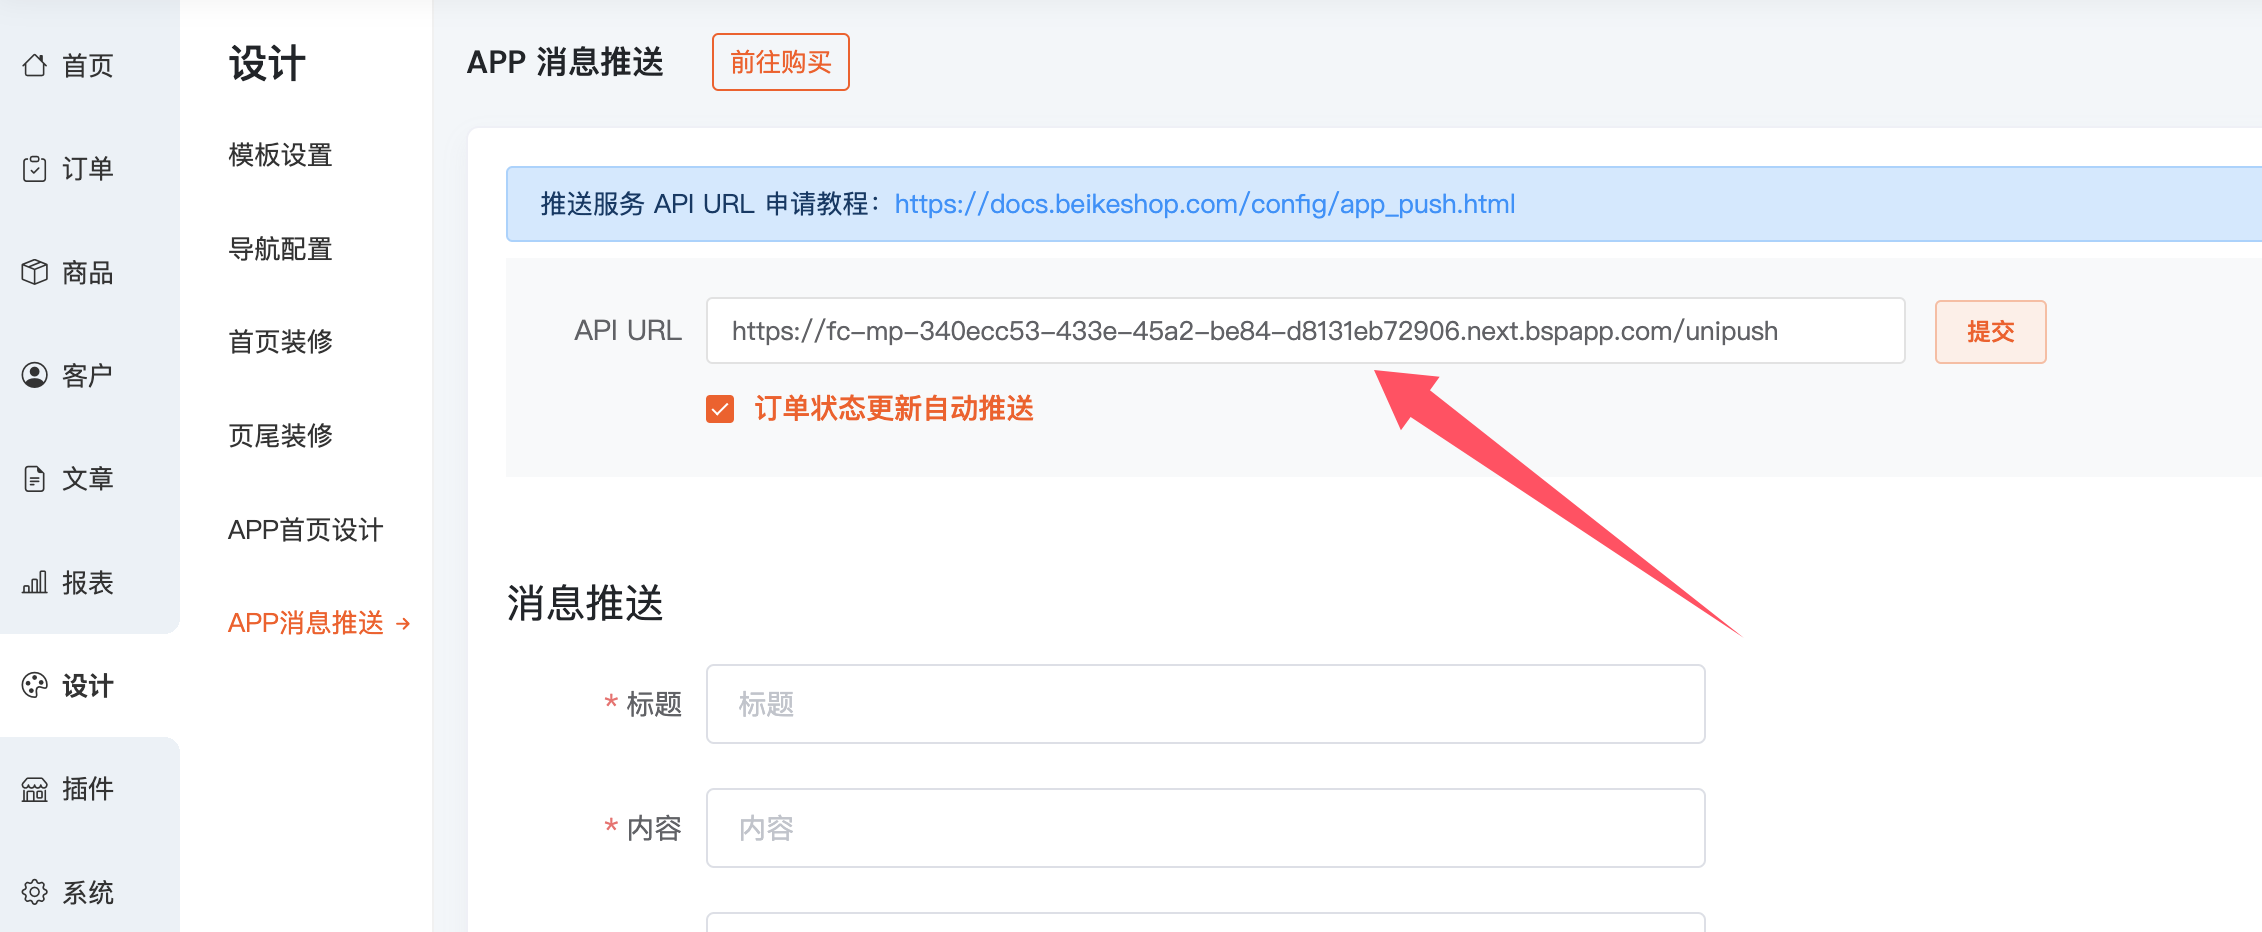
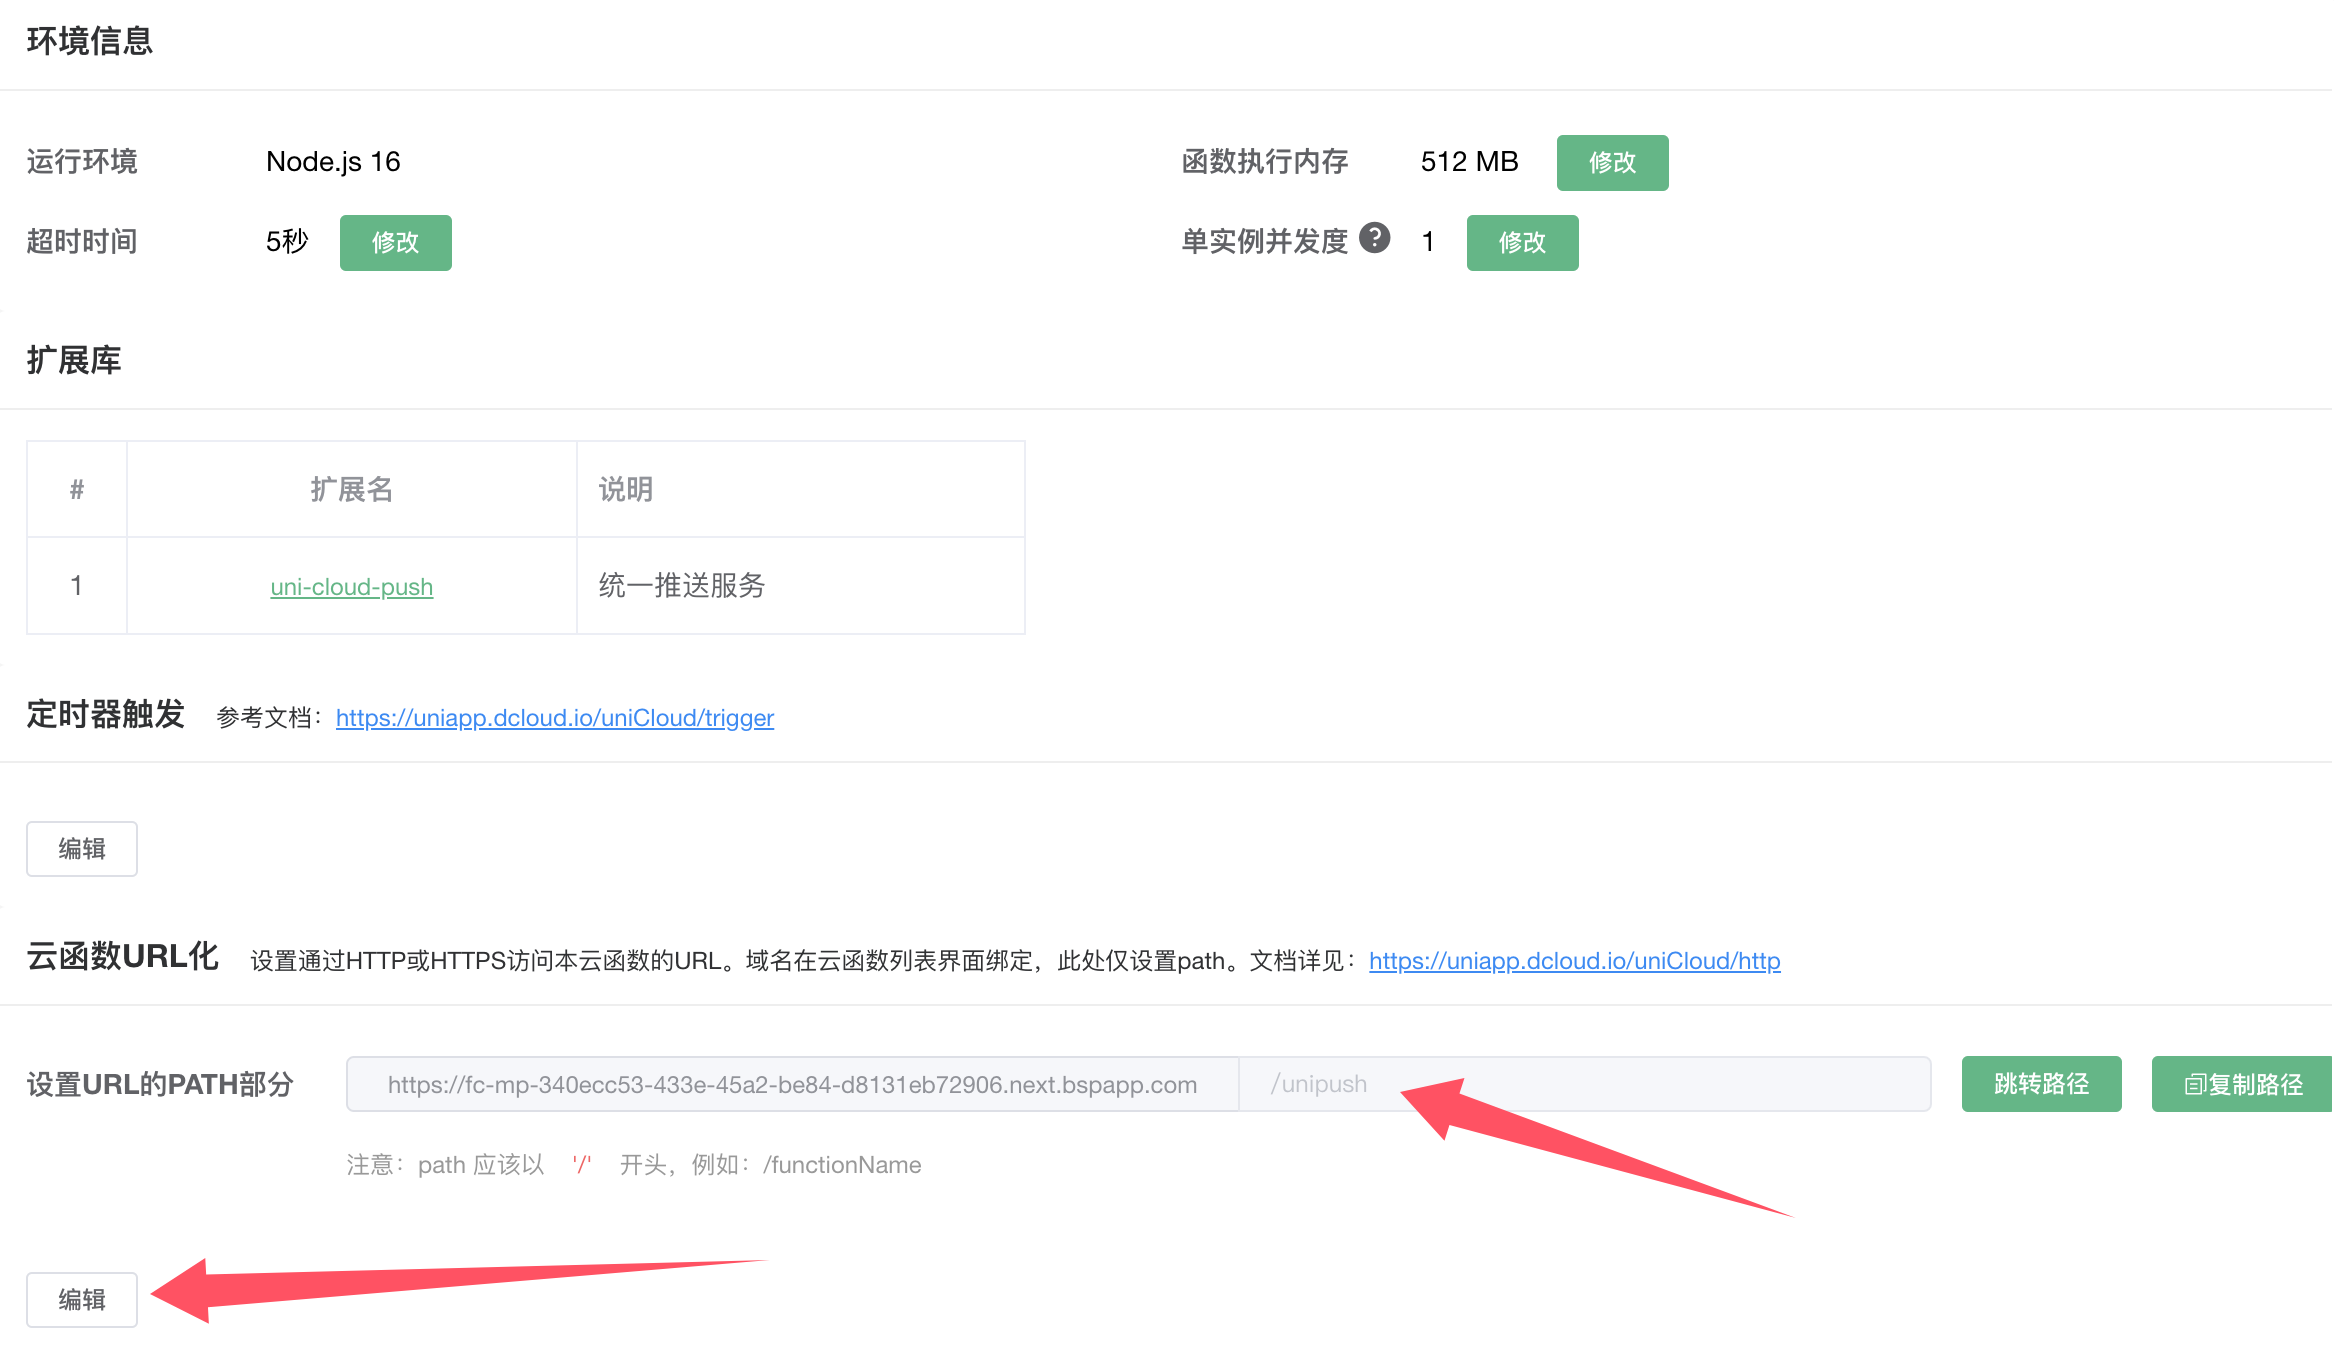
At the bottom of the Details page, click Edit on Cloud Function URLization. In the input box on the right side of the arrow in the figure below, enter: /unipush, click Confirm, and then click Copy Link
Copy the modified Cloud Function URL from the previous step. This is the API URL for the push service. Fill it in the API URL field for APP message push in the beikeshop backend, and submit.