# XPanel
TIP
Note: This tutorial is for users who use the downloaded installation package (https://beikeshop.com/download) and install it in Windows system + phpStudy environment. Please refer to this document; if you have development experience and use composer to install, set the root directory to the public directory in the unzipped file, and directly open the project address in the browser to install!
The latest BeikeShop installation tutorial in 2025! Detailed explanation of XPanel installation
https://www.bilibili.com/video/BV1oGfBYsEzU/ (opens new window)
# Installation Steps
TIP
This document takes Windows 11 system + phpStudy-8.1.1.3 version as an example.
# 1. Install phpStudy
https://www.xp.cn/php-study (opens new window)
The installation process for phpStudy is not described here. If you encounter any issues, please search on Baidu for solutions.
Prerequisites:
- phpStudy has been installed
- The phpStudy program has been successfully started
# 2. Install Environment
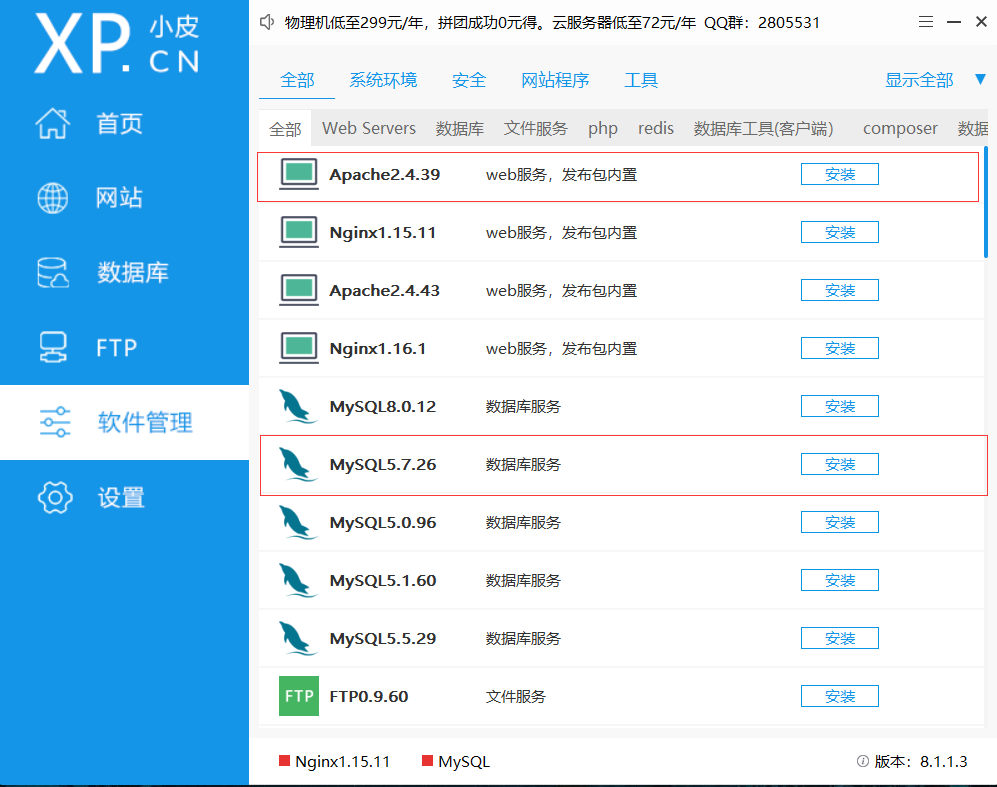
2.1. Enter the phpStudy panel and click [Software Management] to find Apache2.4.39, MySQL5.7, and PHP-8.2. As shown in the figure below
Note: This tutorial takes Apache2.4.39, MySQL5.7, and PHP-8.2 as an example.
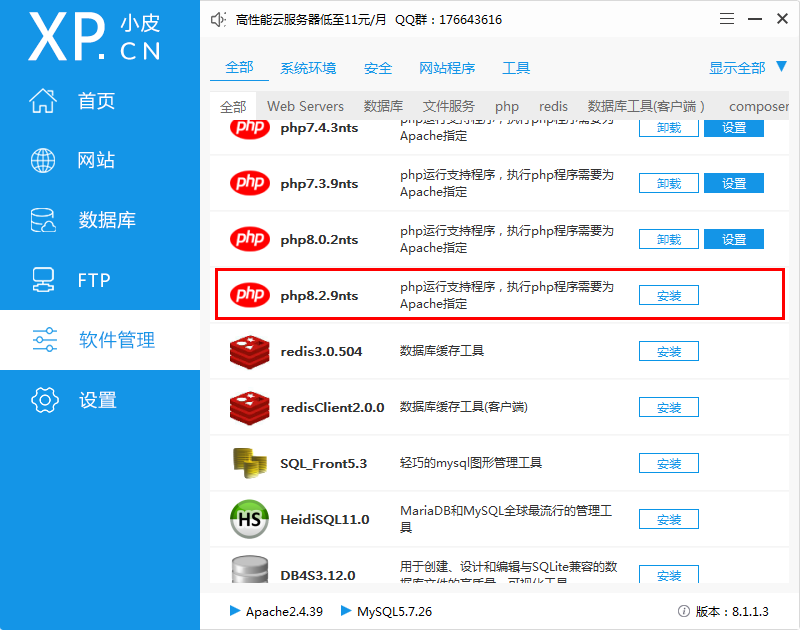
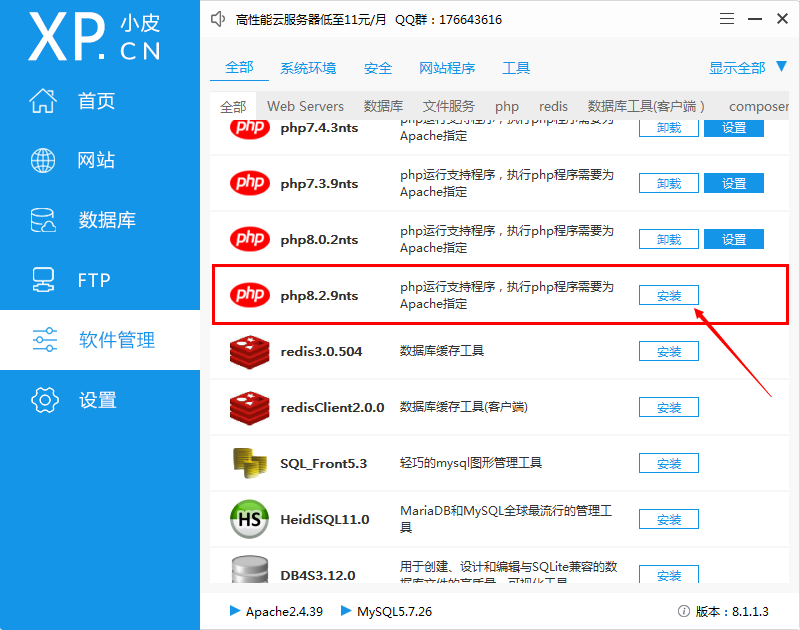
2.2. Install the relevant environment. Click the [Install] button. As shown below
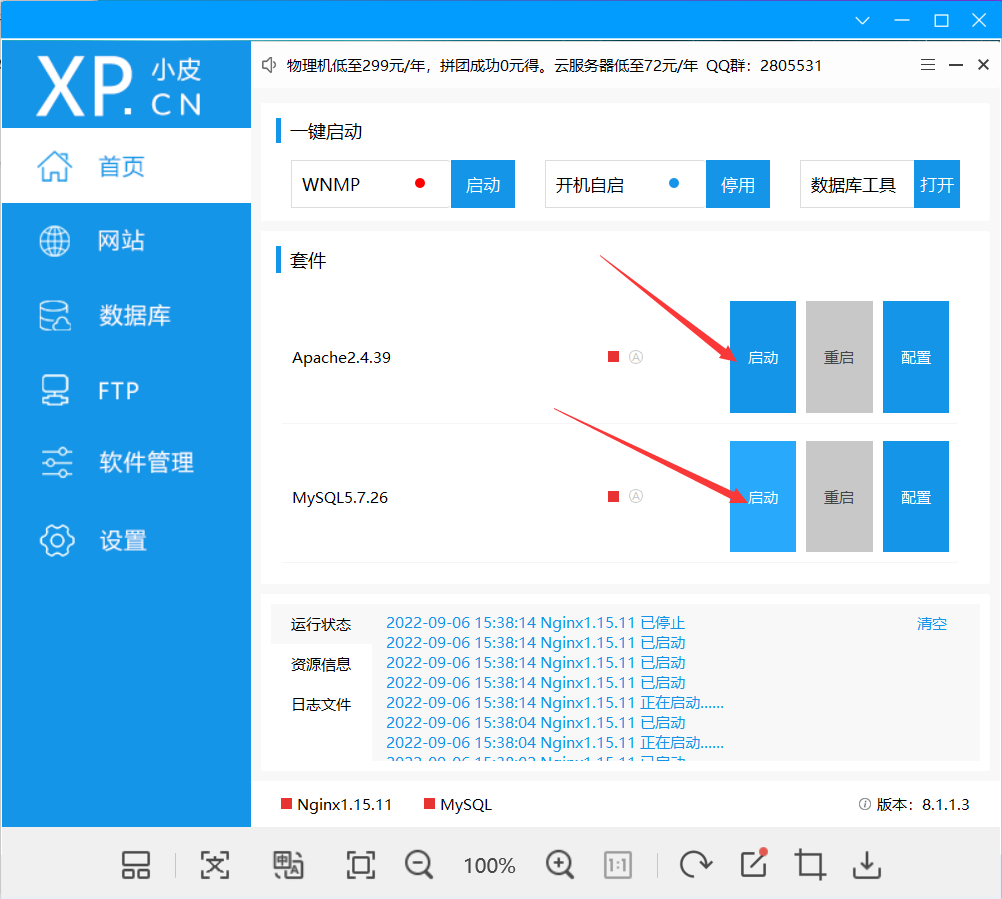
2.3. Start Apache and MySQL (click the home page -> click the Apache and MySQL start buttons respectively). As shown below
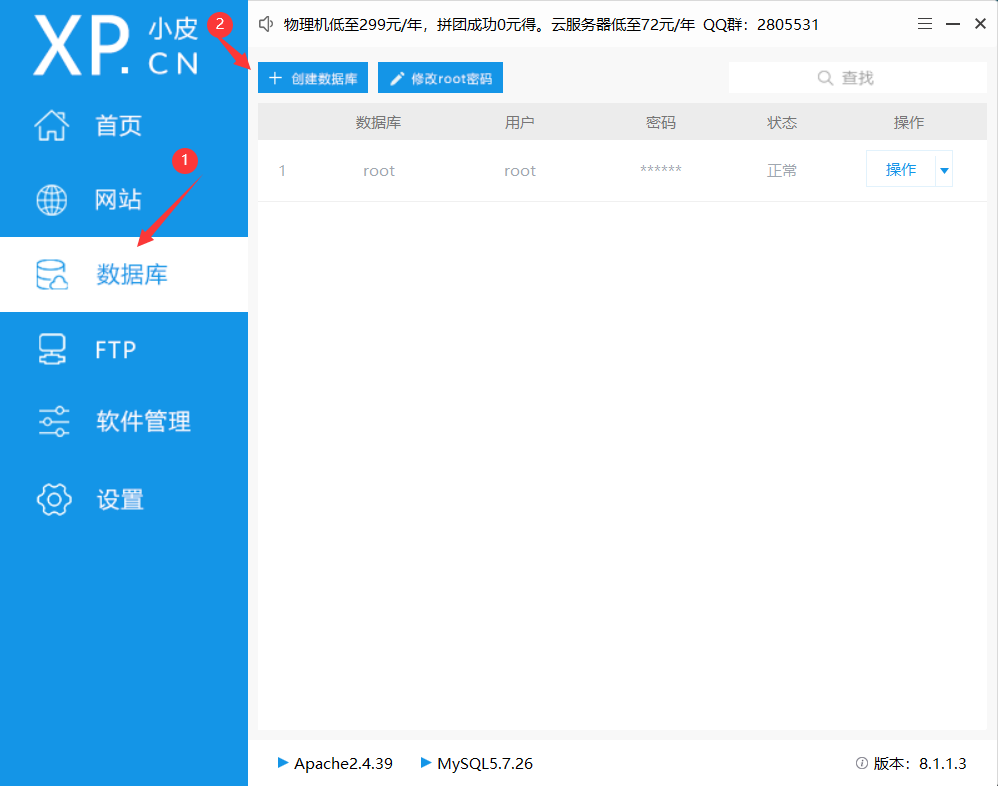
3. Create a database
3.1. Click [Database]->[Create Database] button. As shown below
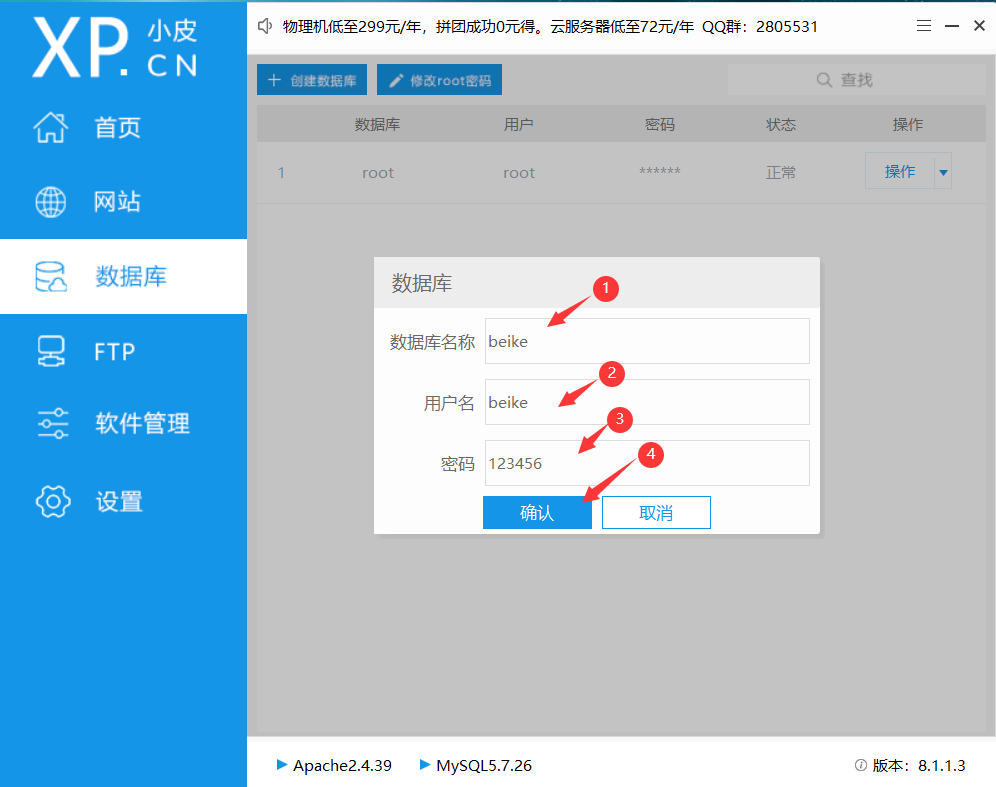
3.2. Fill in the database information and create a database. As shown in the figure below
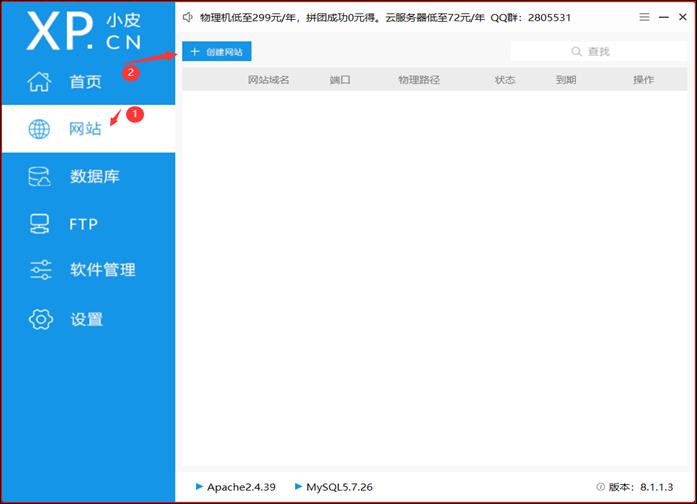
4. Create a website
4.1. Create a website
Click the [Website] menu -> click [Create Website]. As shown below
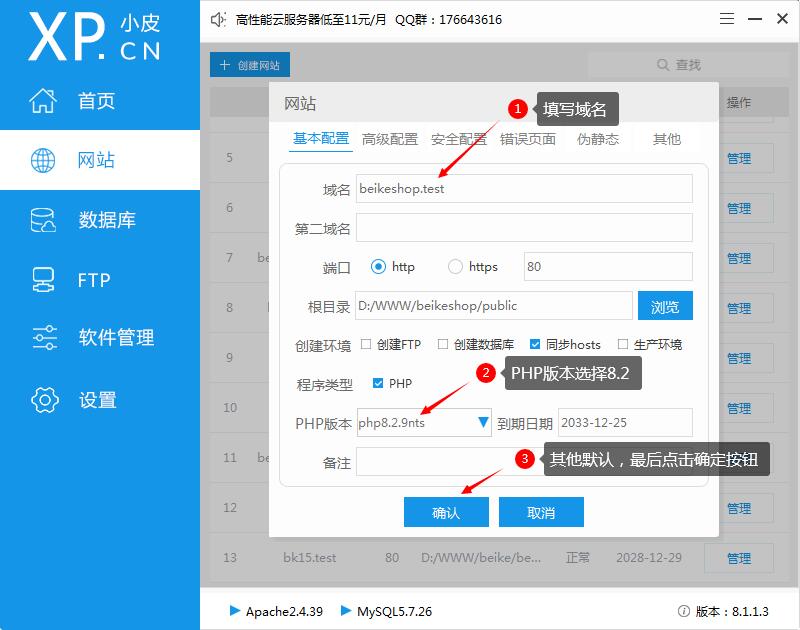
4.2. Add Domain
Fill in the website information to create a website. As shown below
4.3. Download and Upload the Installation Package to the Specified Directory
Unzip the downloaded compressed package to the directory generated in the previous step. As shown in the figure below
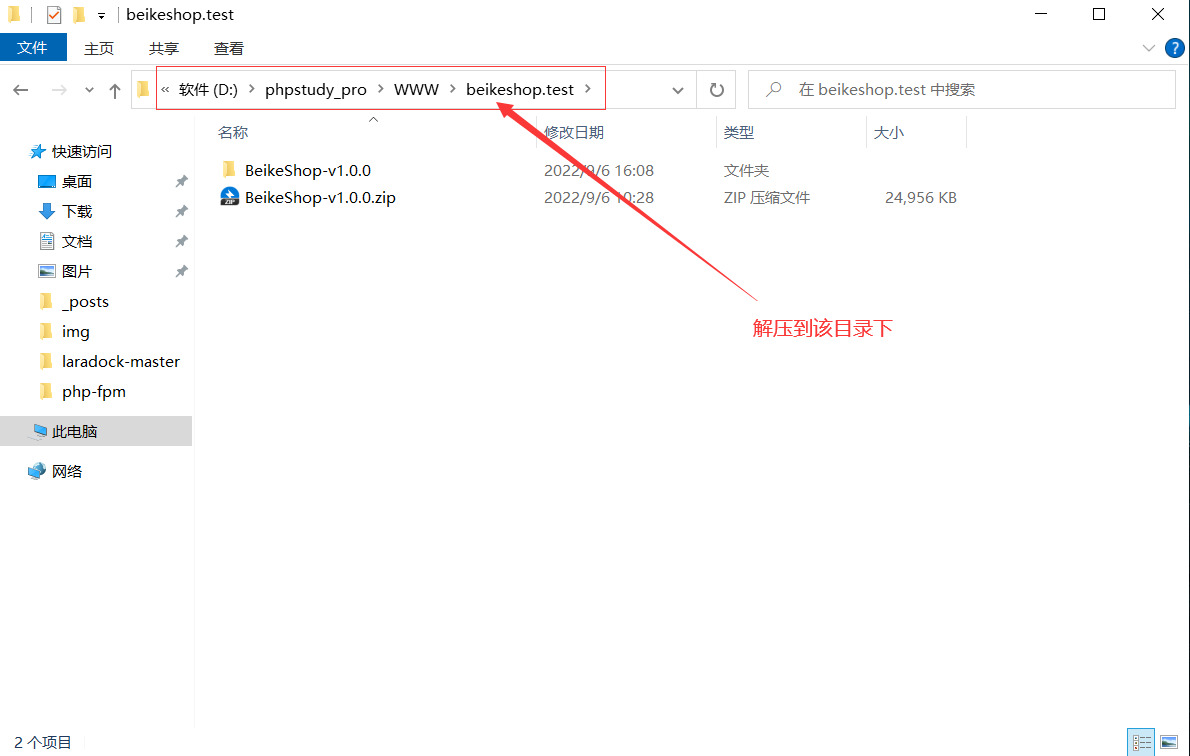
Note: The tutorial directory is D:\phpstudy_pro\WWW\beikeshop.test for demonstration purposes only. Please refer to the actual directory for details.
4.4. Set Website Root Directory
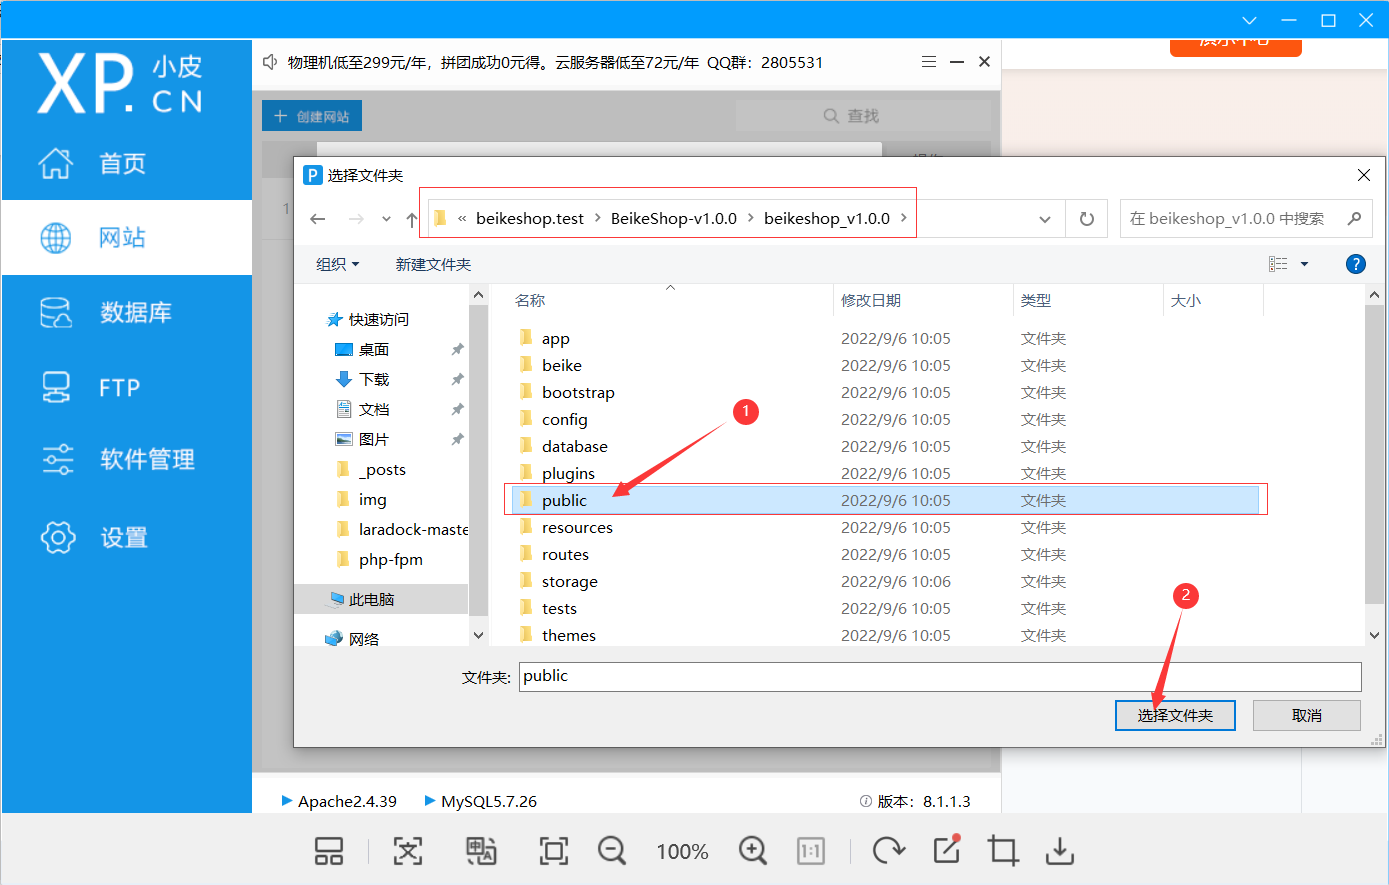
Change the system root directory to public (important)
Method 1: (recommended)
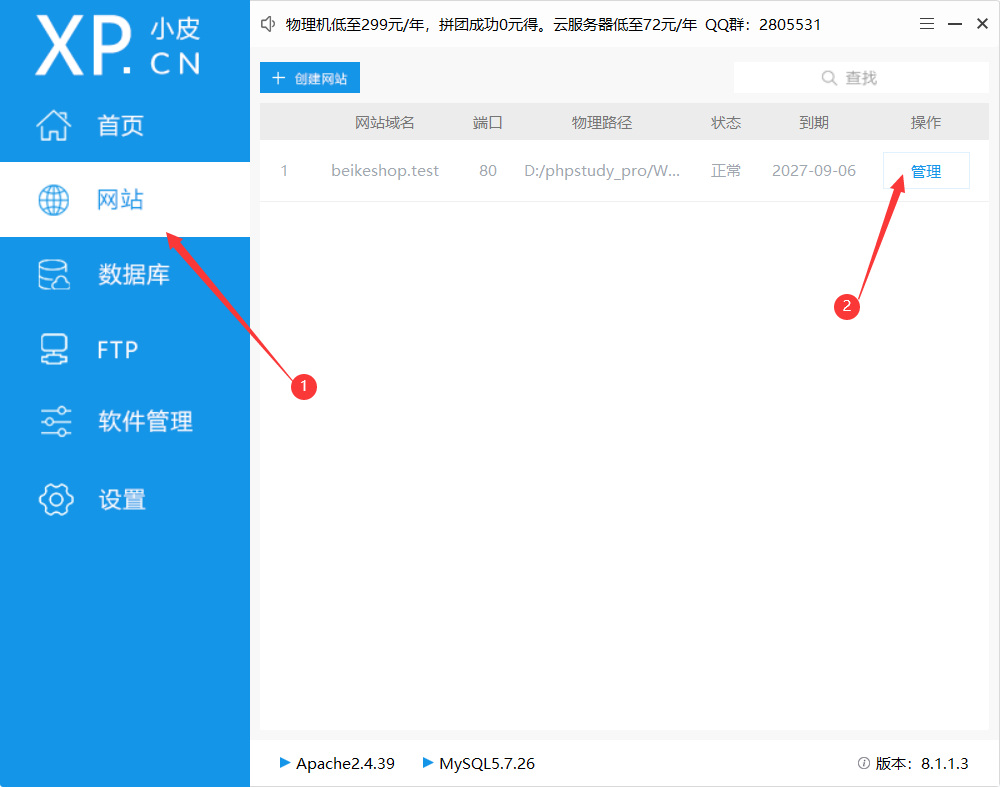
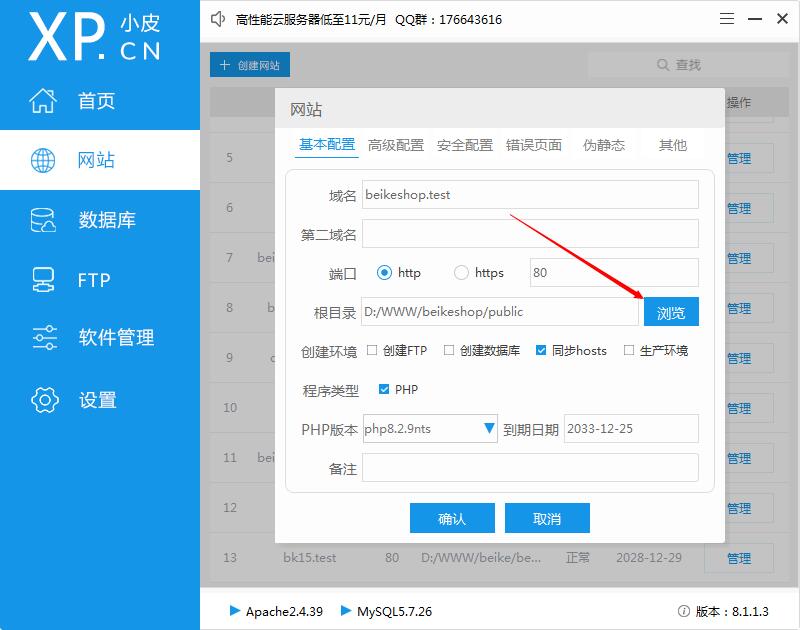
Click [Website] -> [Manage] -> [Modify] -> [Browse], select the public directory in the unzipped file, and finally click OK. As shown in the figure below
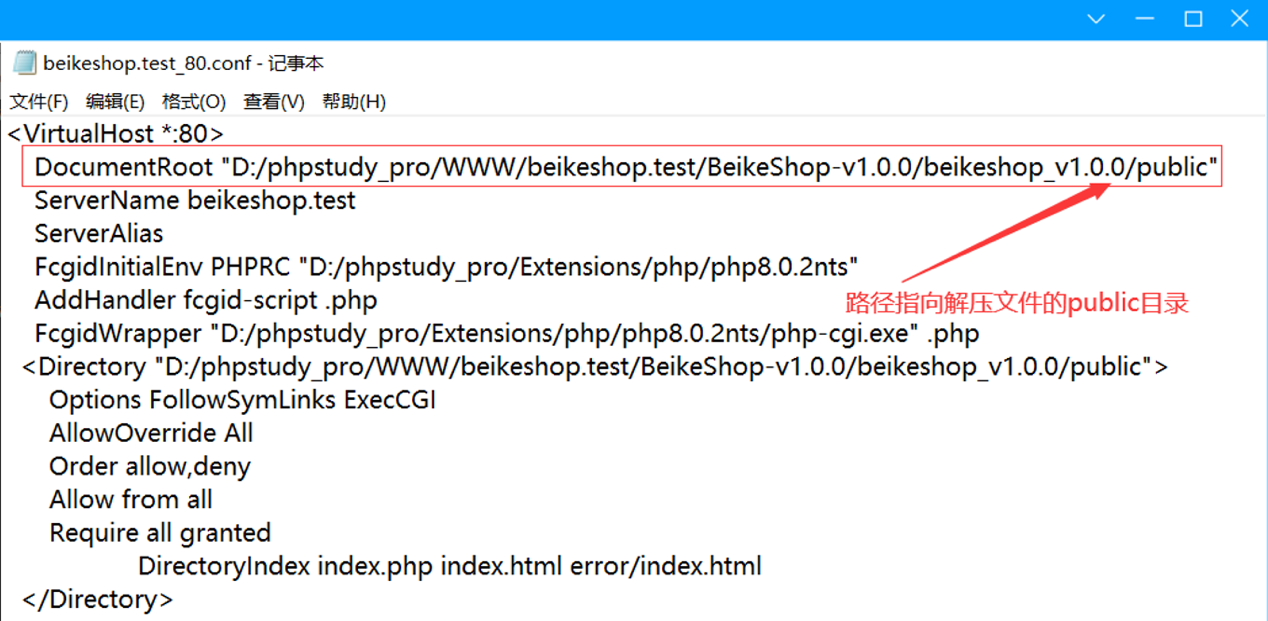
Method 2: Modify the configuration file
Find the apache configuration file and modify it. As shown in the figure below Note: The configuration file in this tutorial is the beikeshop.test_80.conf file in the D:\phpstudy_pro\Extensions\Apache2.4.39\conf\vhosts\ directory. The configuration file is generally placed in \phpStudy installation directory\EExtensions\Apache2.4.39\conf\vhosts. The configuration file starts with the input domain name and ends with _80.conf. The actual configuration file shall prevail.
TIP
Using Nginx as the web server differs from Apache; with Nginx, you need to configure rewrite rules.
4.5 Configure Rewrite Rules (Nginx)
If using Nginx, you need to configure rewrite rules.
In phpStudy Panel, go to [Website], find the corresponding site, and click [Manage]. In the site popup, click [Rewrite Rules] and enter the following content. As shown in the figure:
location / {

 try_files $uri $uri/ /index.php?$query_string;

}

# 5. System Installation
Enter the domain name you created in step 4.2 in the browser.
Note: This tutorial uses beikeshop.test for installation demonstration only and is only valid for the current host. Please refer to the actual

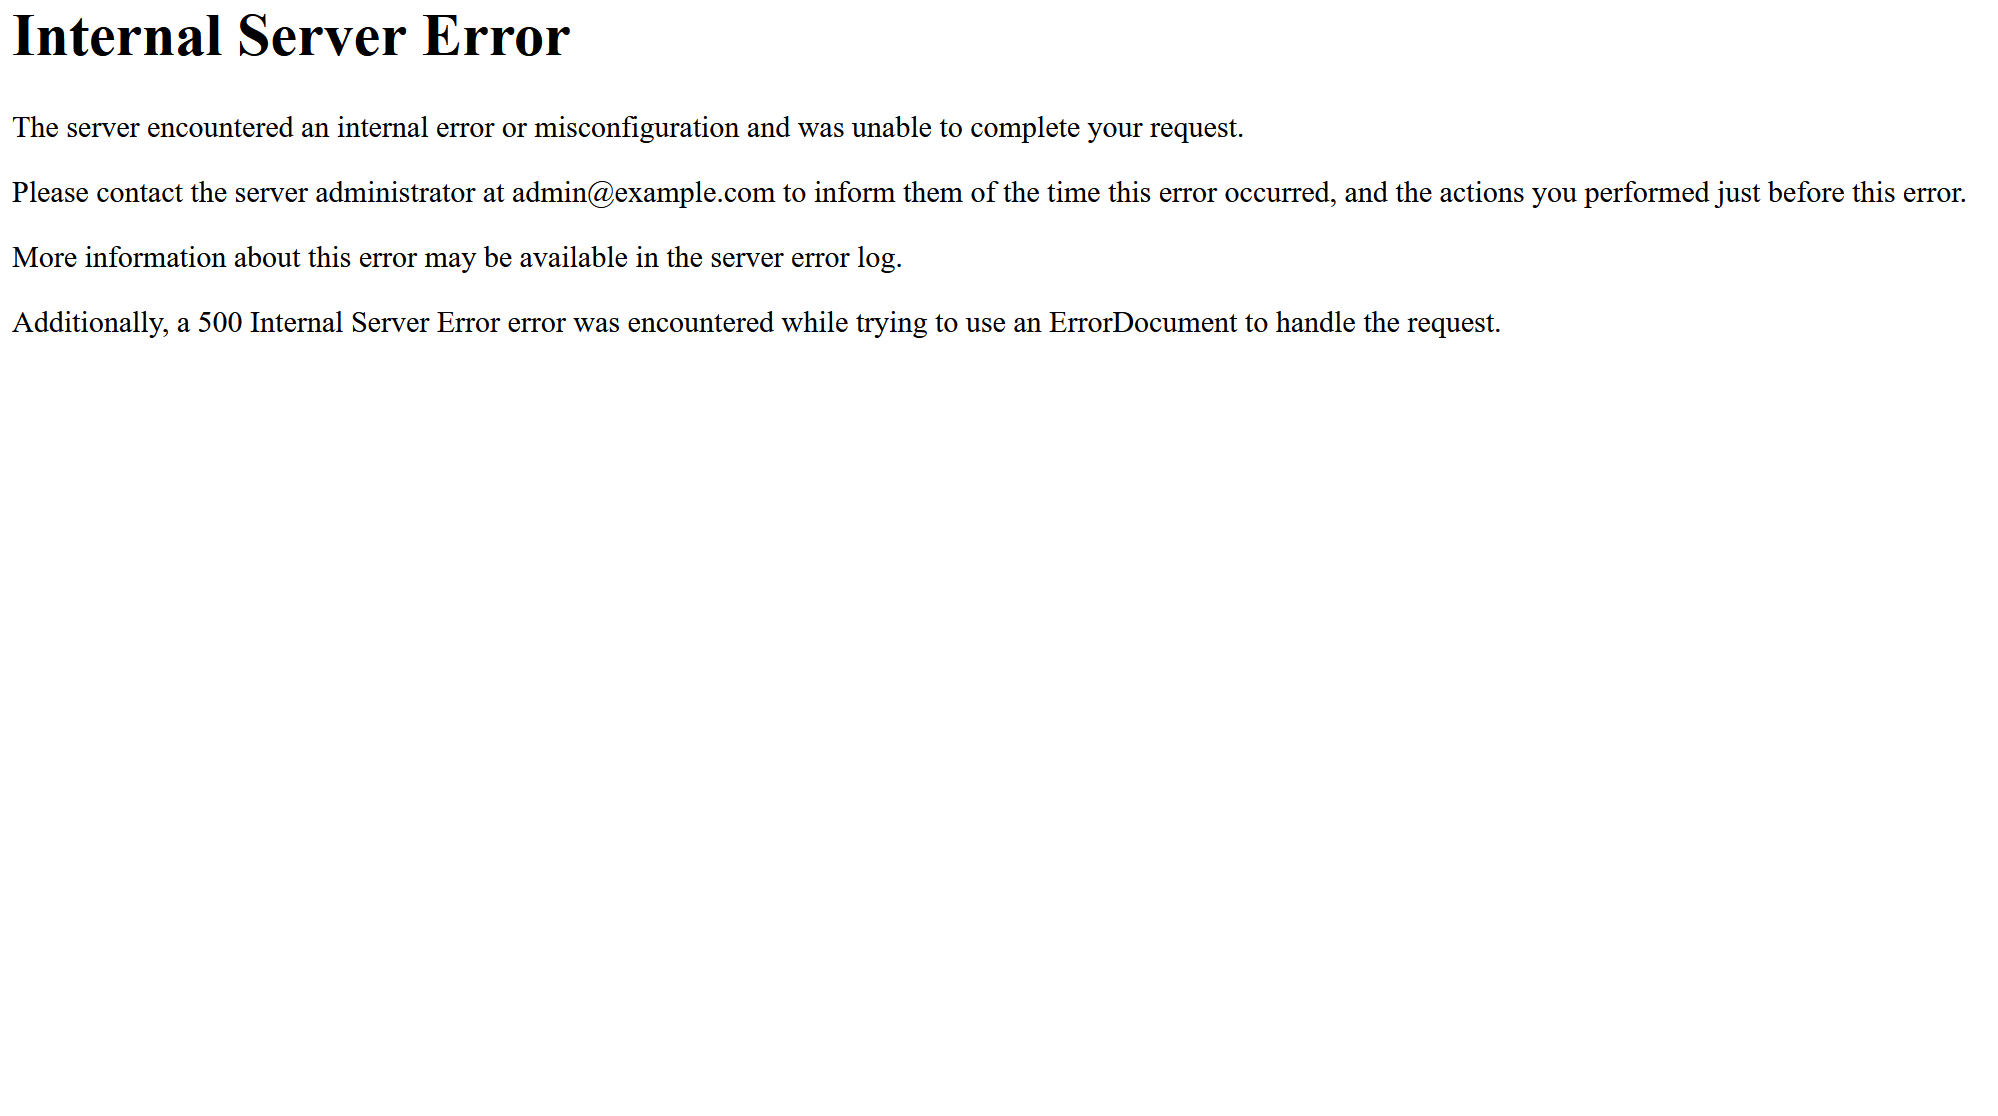
Note: When XPanel creates a website, it will automatically generate an empty .htaccess file to replace the original file. If you visit the installation page as shown in the figure, Internal Server Error will appear. Please check whether the content of the .htaccess file is empty. If it is empty, please copy the content of the .htaccess file in the unzipped package to the empty package and try to install it again.
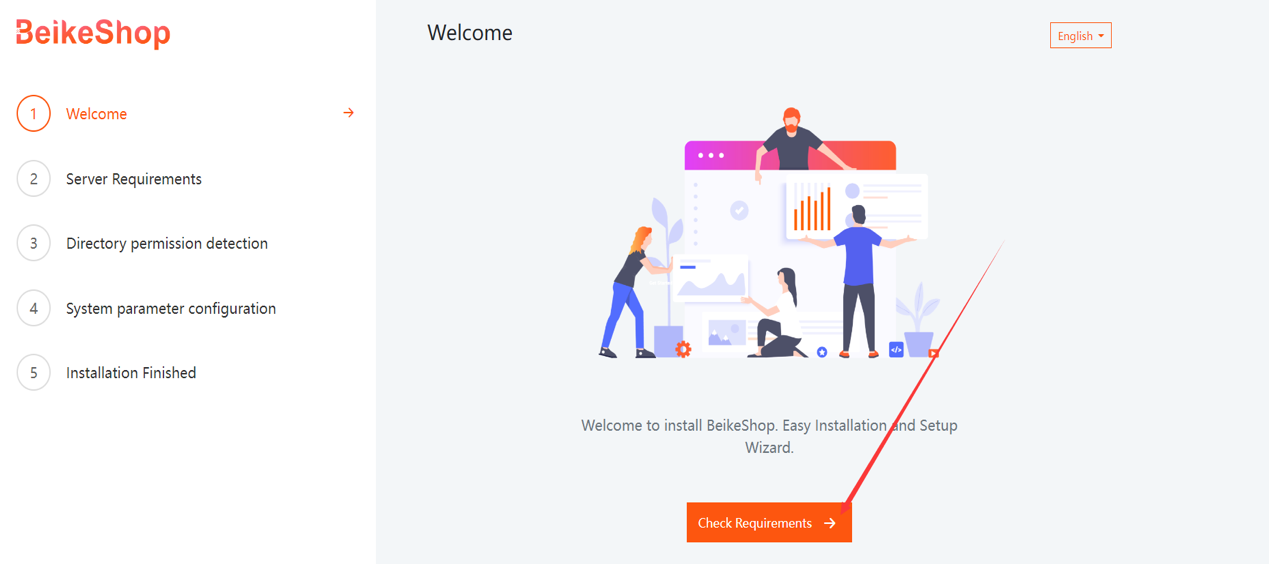
If the page shown in the figure appears, you have successfully accessed the installation page.
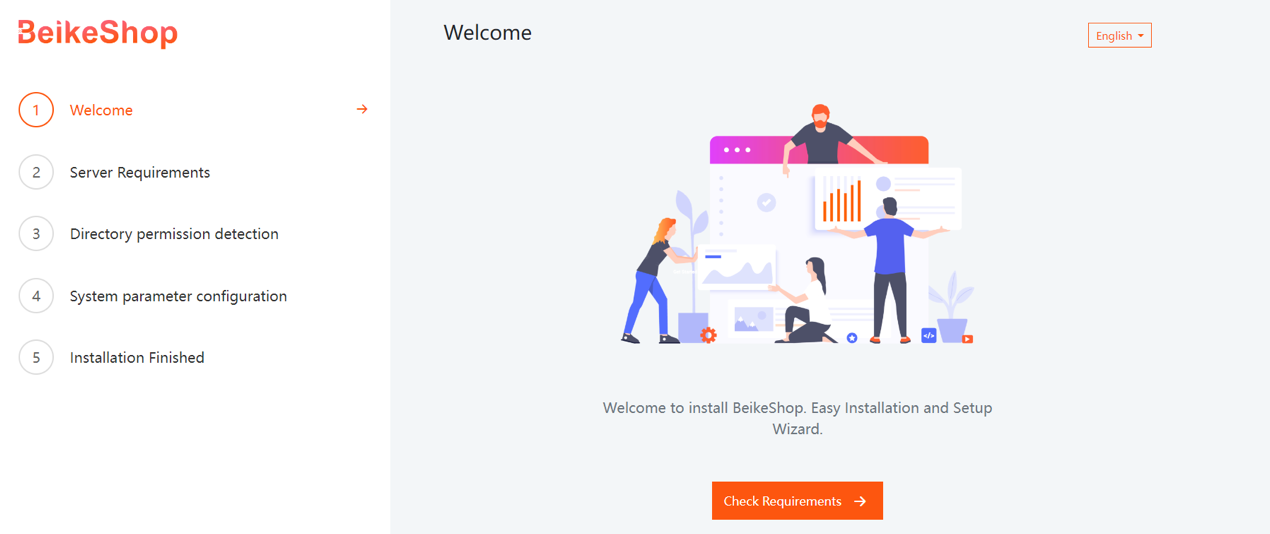
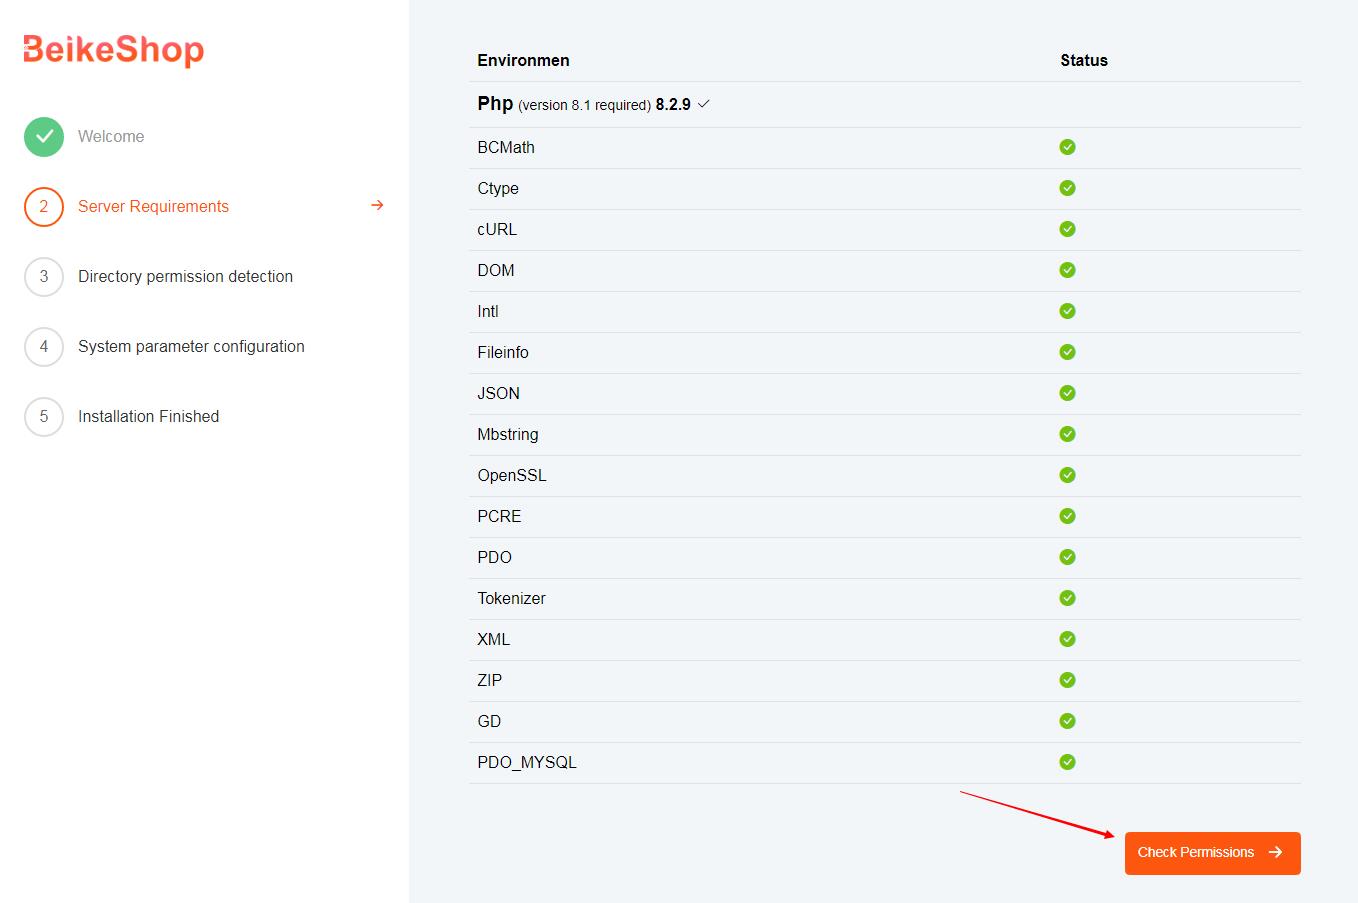
Click the buttons in order: Check Requirements, Check Permissions, Configure Environment, and finally Installation Finished to complete the process.
Step 1: Installation Interface
Step 2: Environment Check
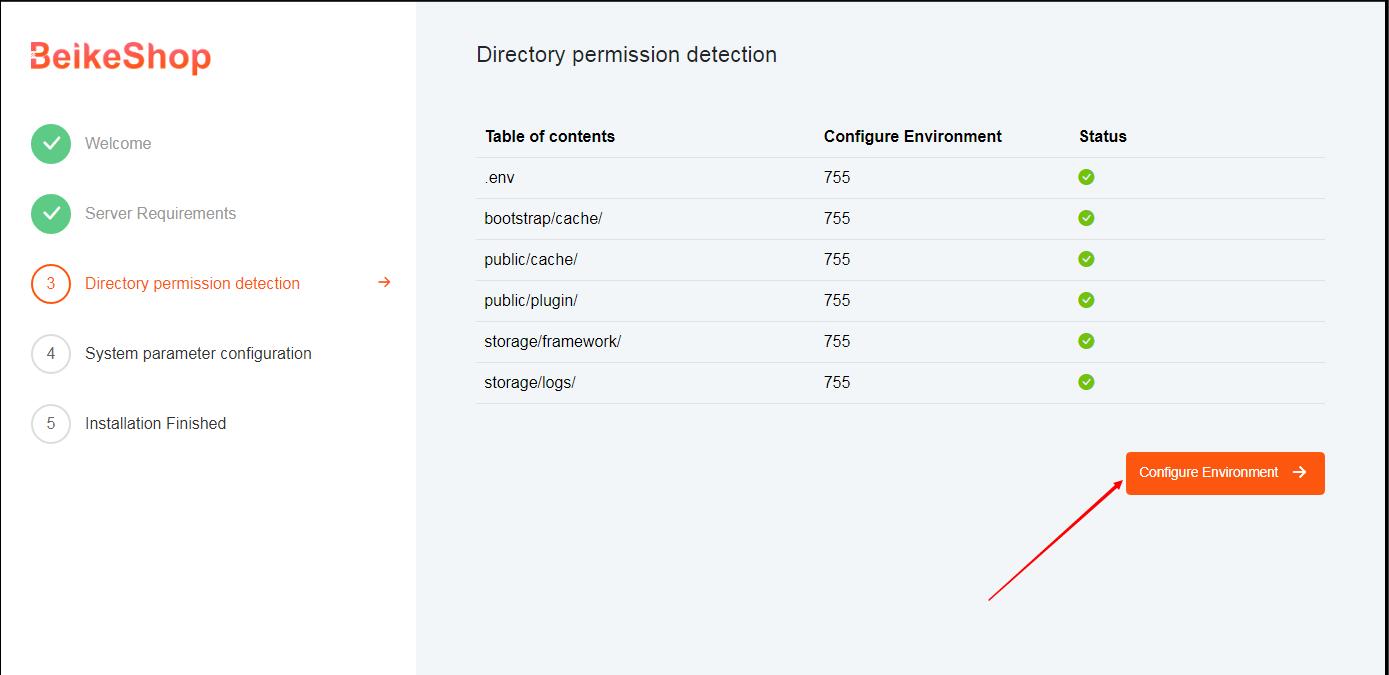
Step 3: Directory Permissions Check
Step 4: Fill in the database and admin login information, then click the Install button
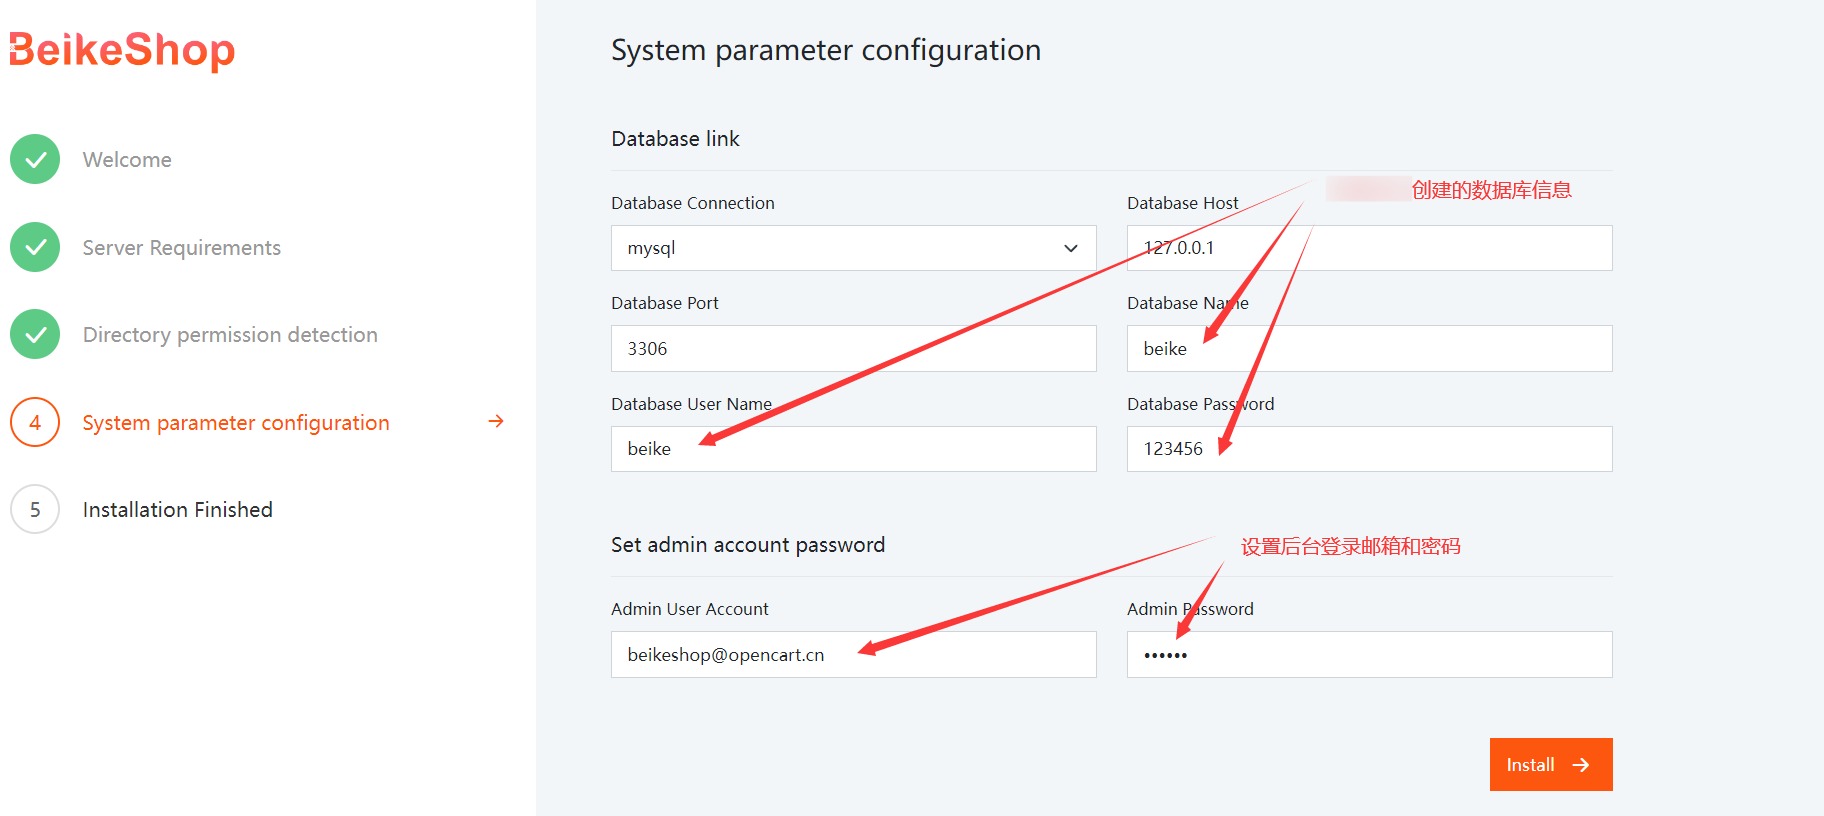
Note: The field "Set admin account password" will only appear after the system successfully verifies the Database information.
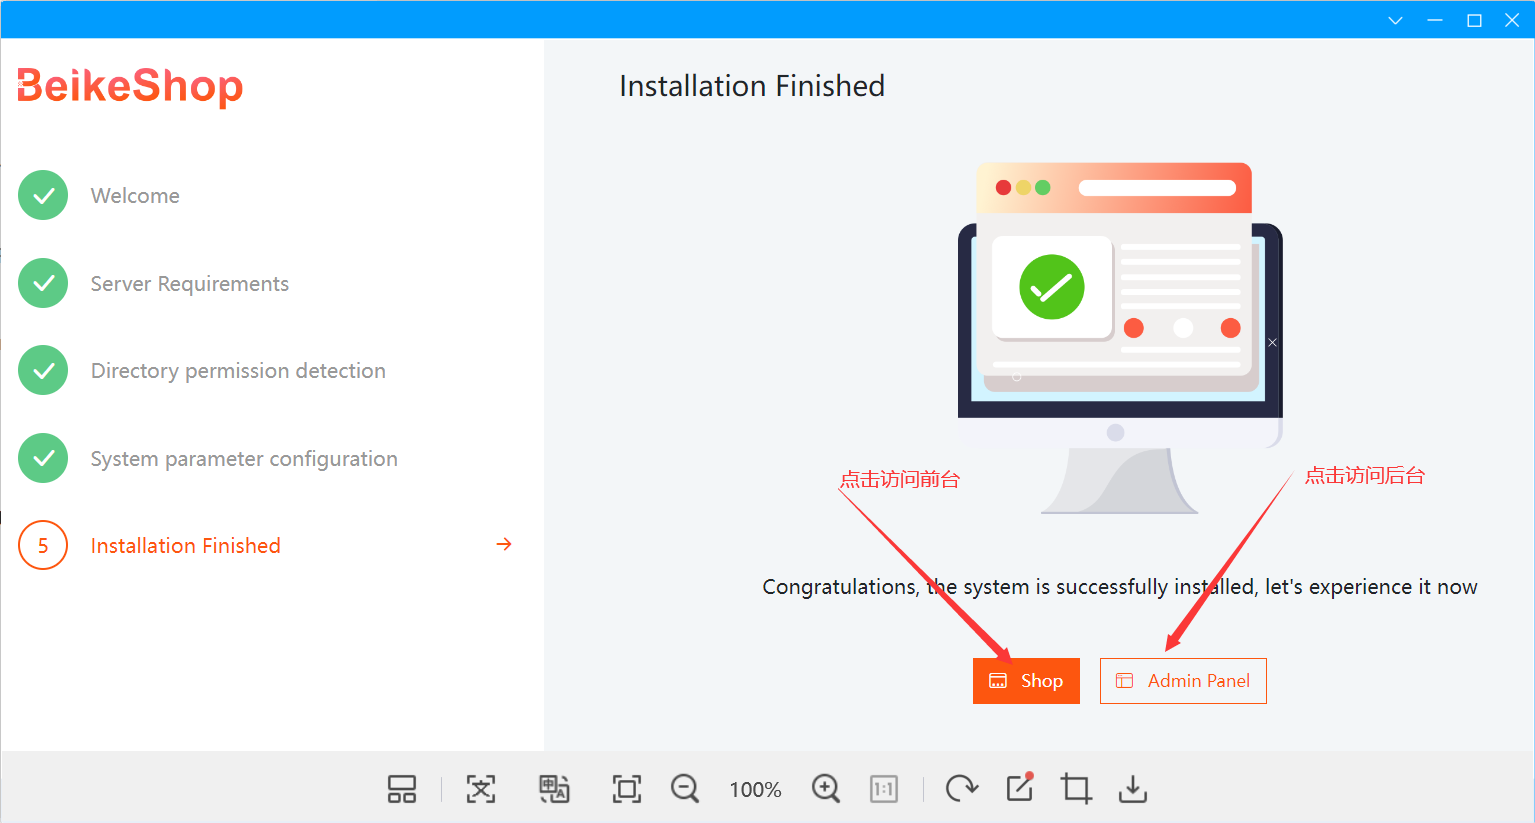
Step 5: Installation successful. If the page shown in the figure appears, the installation has been completed successfully.
# 6. Shopping Mall Interface
Frontend Interface

Backend Interface
TIP
So far: The installation tutorial ends here, and you can use the system next!
If you have any other questions, please contact marketing@guangda.work / QQ:9358972
Chengdu Guangda Network Technology Co., Ltd. All rights reserved
For common issues during the installation process, please refer to: FAQ– Installation Issues