# BTPanel
TIP
Note: This tutorial is for users who use the downloaded installation package (https://beikeshop.com/download) and install it in Linux system + Baota environment, please refer to this document; if you have development experience and use composer to install, set the root directory to the public directory in the decompressed file, and directly open the project address in the browser to install it!
The latest BeikeShop installation tutorial in 2026! Detailed explanation of BTPanel installation
# Installation Steps
TIP
This document takes the BTPanel version 8.0.4 and CentOS 8.5 system as examples.
# 1.Install BTPanel
https://www.bt.cn/new/download.html (opens new window)
The installation process of the Baota is not described here. If you have any questions, please Baidu
Prerequisites
- The host has installed the Baota software
- Log in to the Baota control panel
# 2. Install Environment
# 2.1. Install PHP
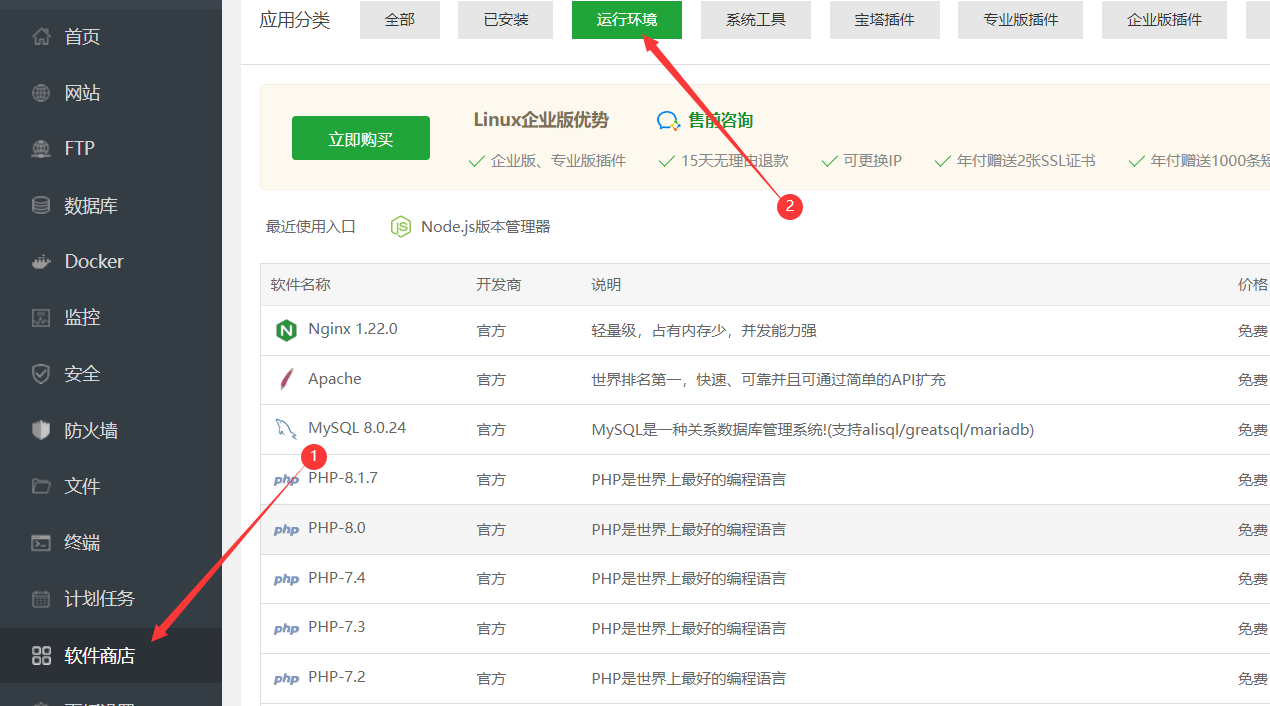
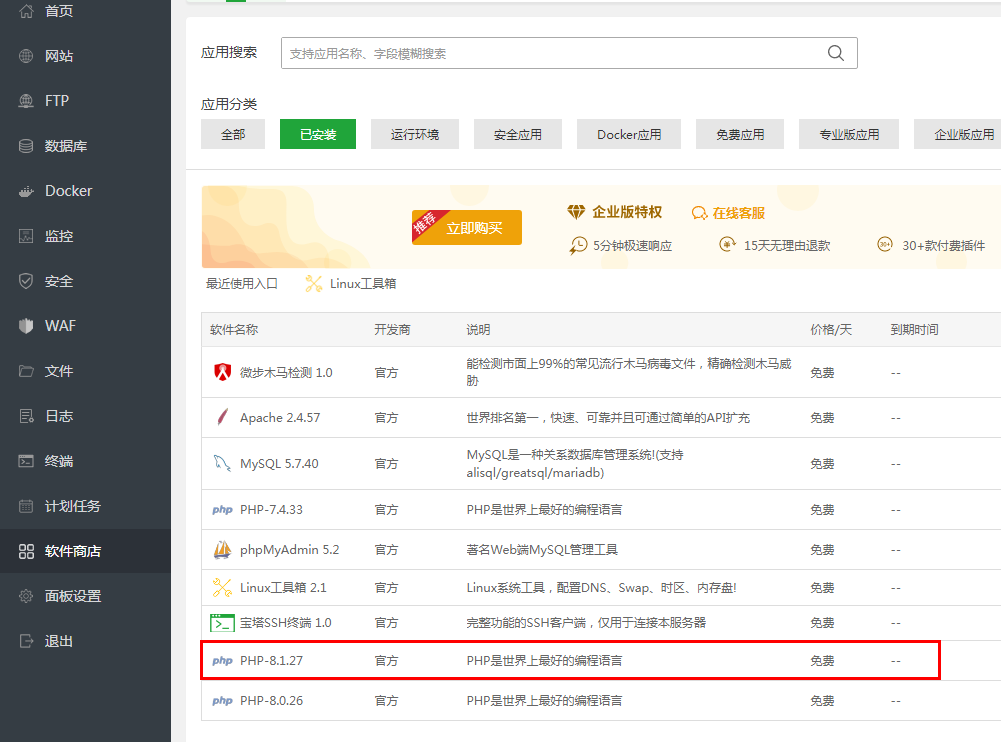
2.1.1. In the Baota console, click [Software Store] -> [Running Environment] and search for PHP software. As shown in the following figure:
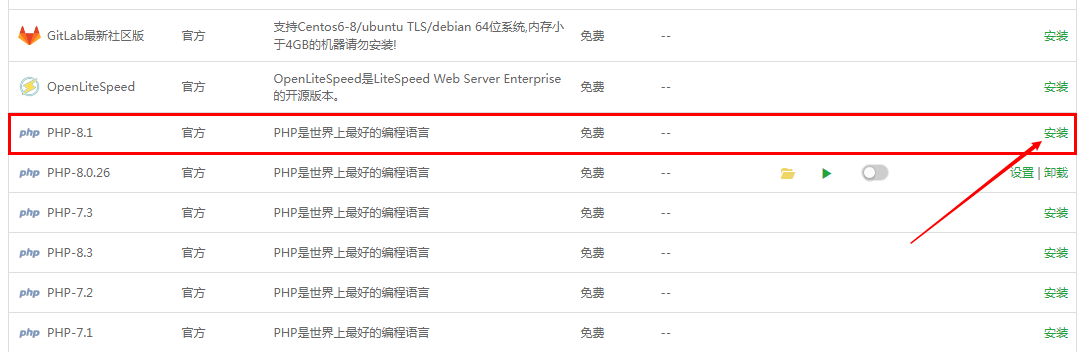
2.1.2. Find PHP-8.2 and click the [Install] button in the operation bar. As shown below:
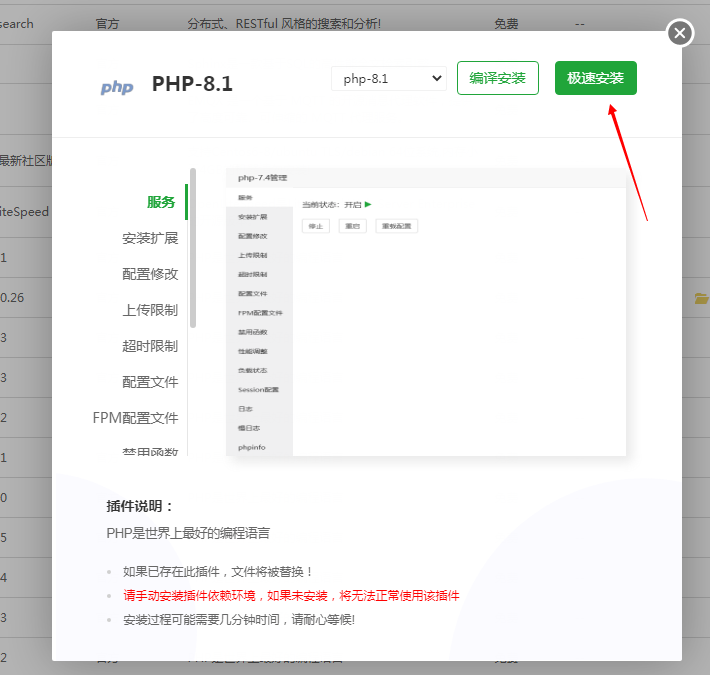
2.1.3. Select the default installation method, click the Submit button, and wait for the installation to complete. As shown below:
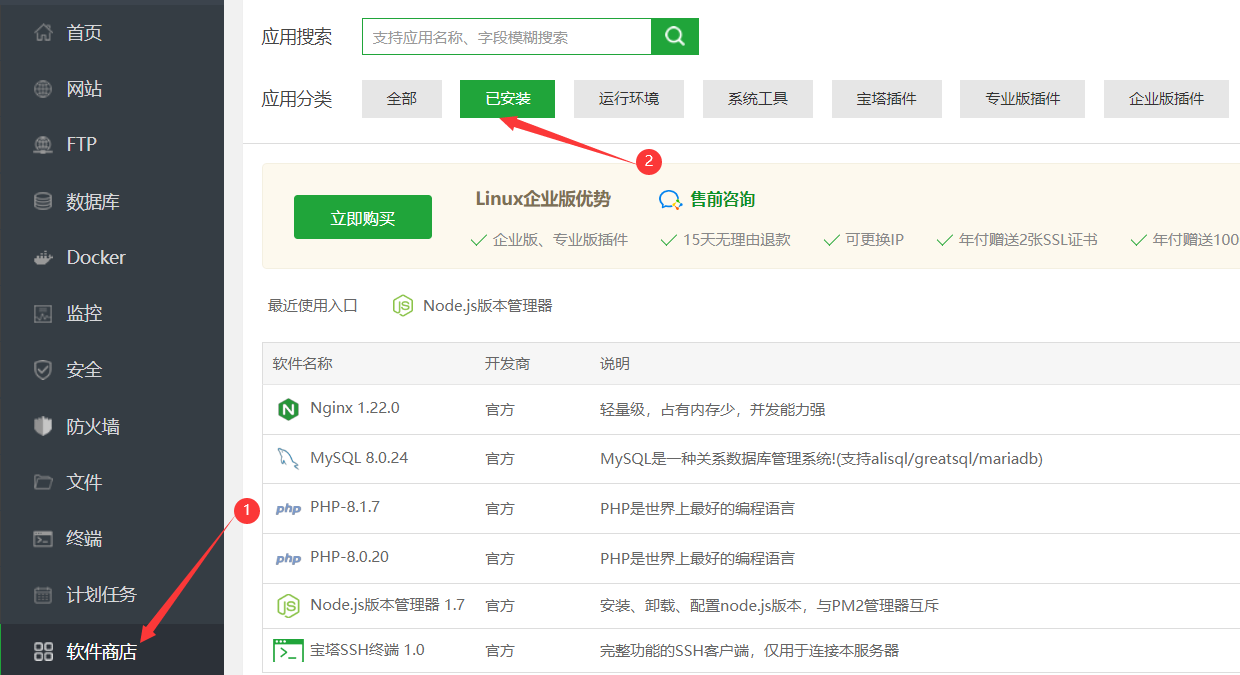
2.1.4. Install the fileinfo extension for PHP. In the Baota console, click [Software Store] -> [Installed] to find the installed PHP software. As shown in the following figure:
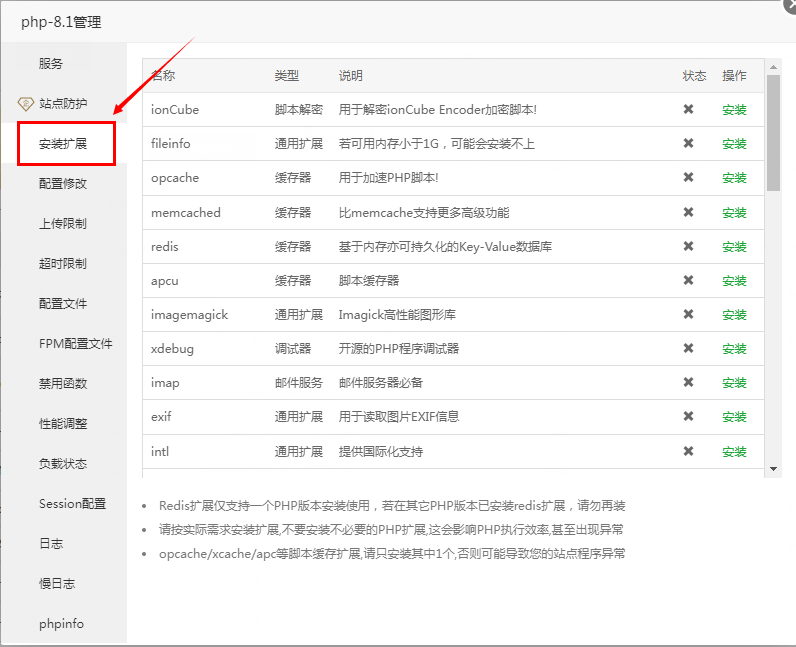
2.1.5. Click to select the PHP software name you want to use for the BeikeShop system (must be 8.2 or above). As shown in the figure below:
2.1.6. In the pop-up [PHP Management] window, click [Install Extension] to install the extension settings. As shown in the following figure:
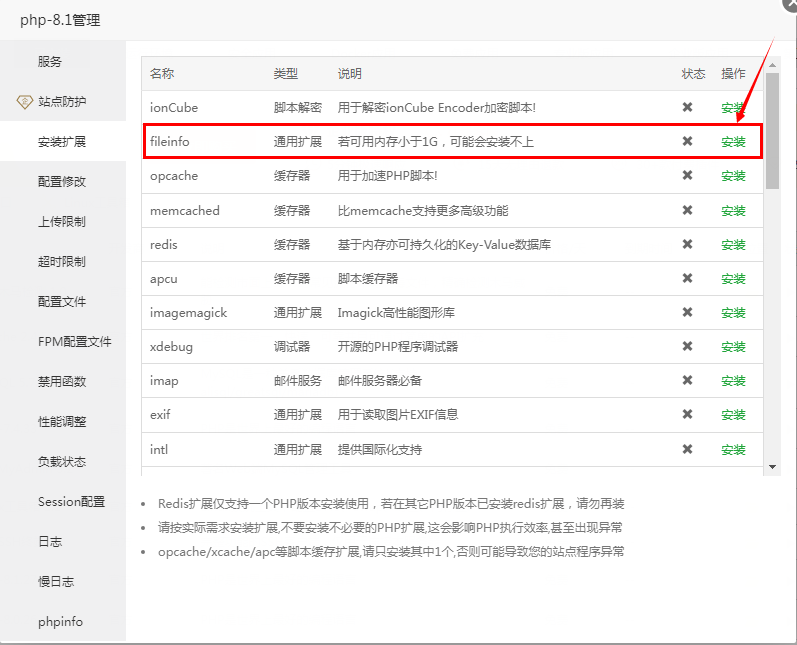
2.1.7. Select [fileinfo] and click [Install]. As shown below
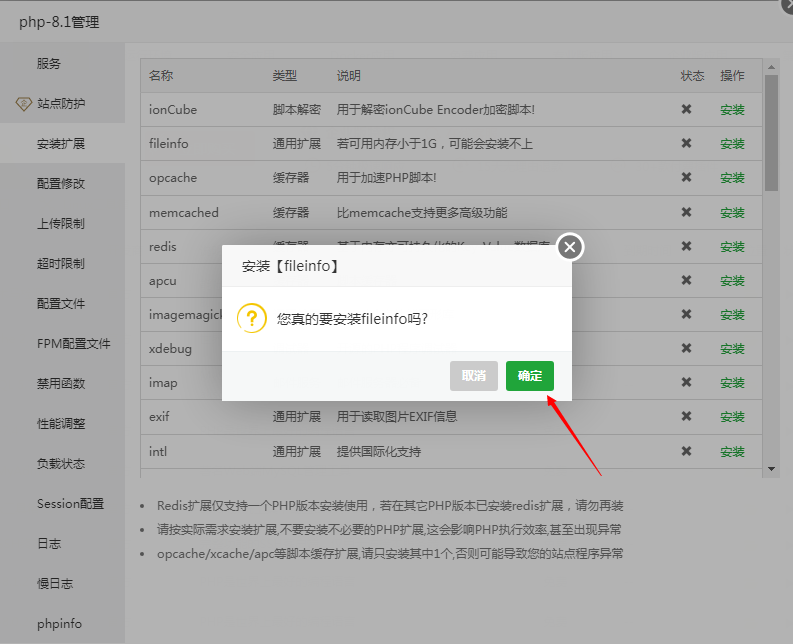
2.1.8. In the pop-up fileinfo installation window, click [OK]. As shown in the following figure:
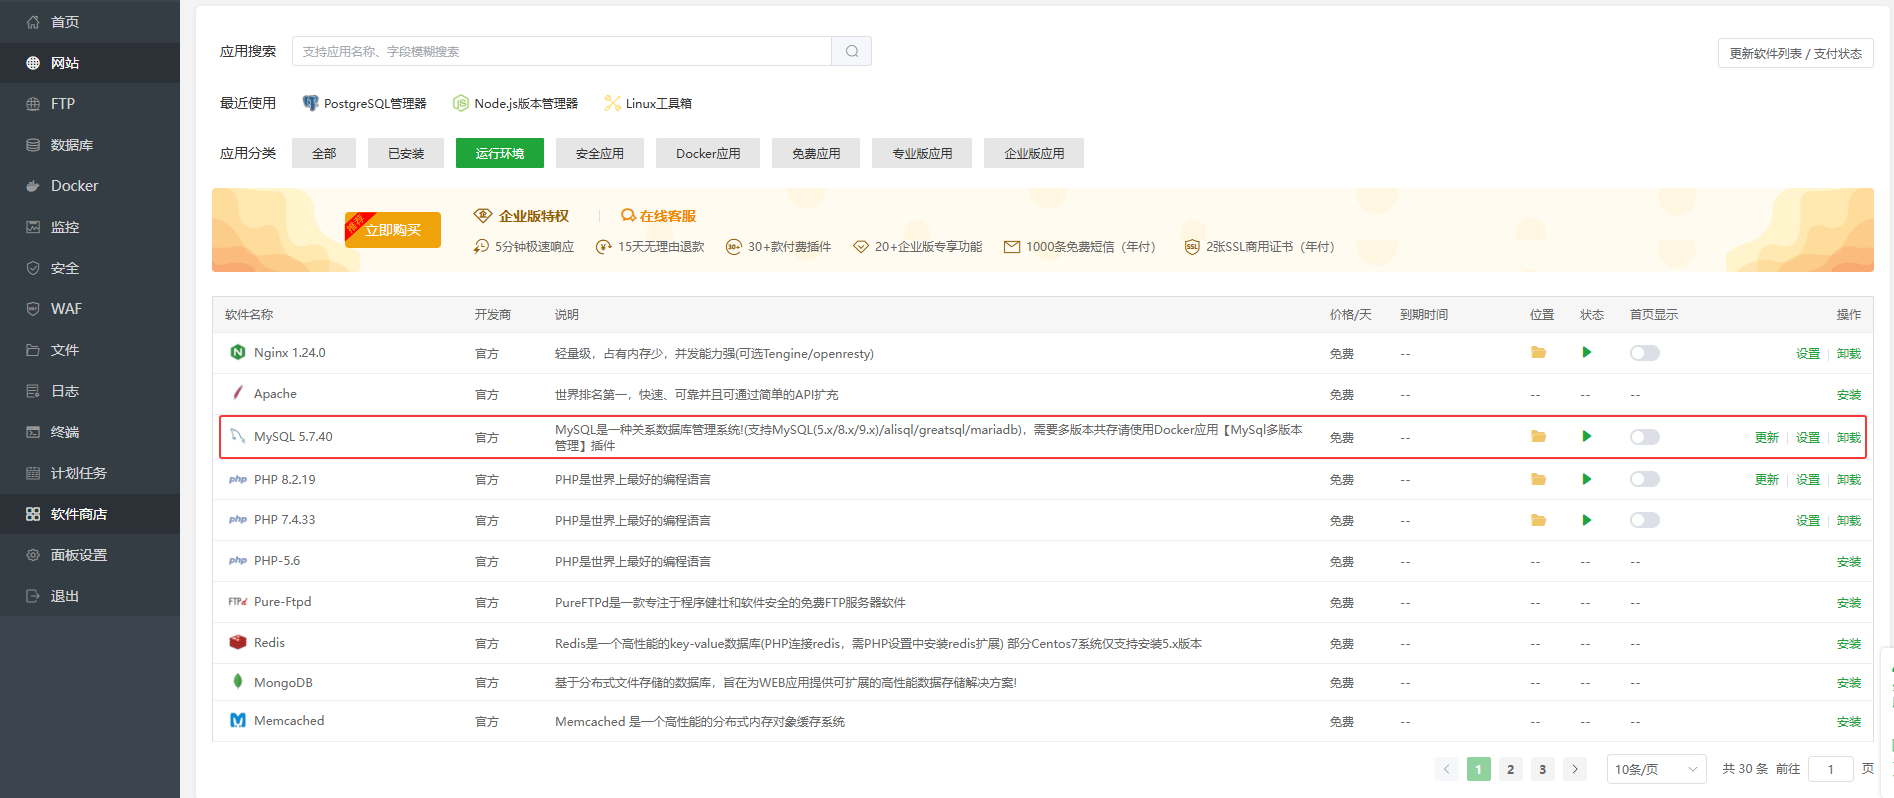
# 2.2. Install MySQL
Click the Software Store menu, find MySQL 5.7 for installation, and refer to the PHP installation method; it will not be repeated here. Note: The minimum required MySQL version is 5.7.
# 2.3. Install Apache or Nginx
Click the Software Store menu, find and install either Apache or Nginx (install only one), and refer to the PHP installation method; it will not be repeated here. (Note: Apache 2.4+ or Nginx 1.10+ is required)
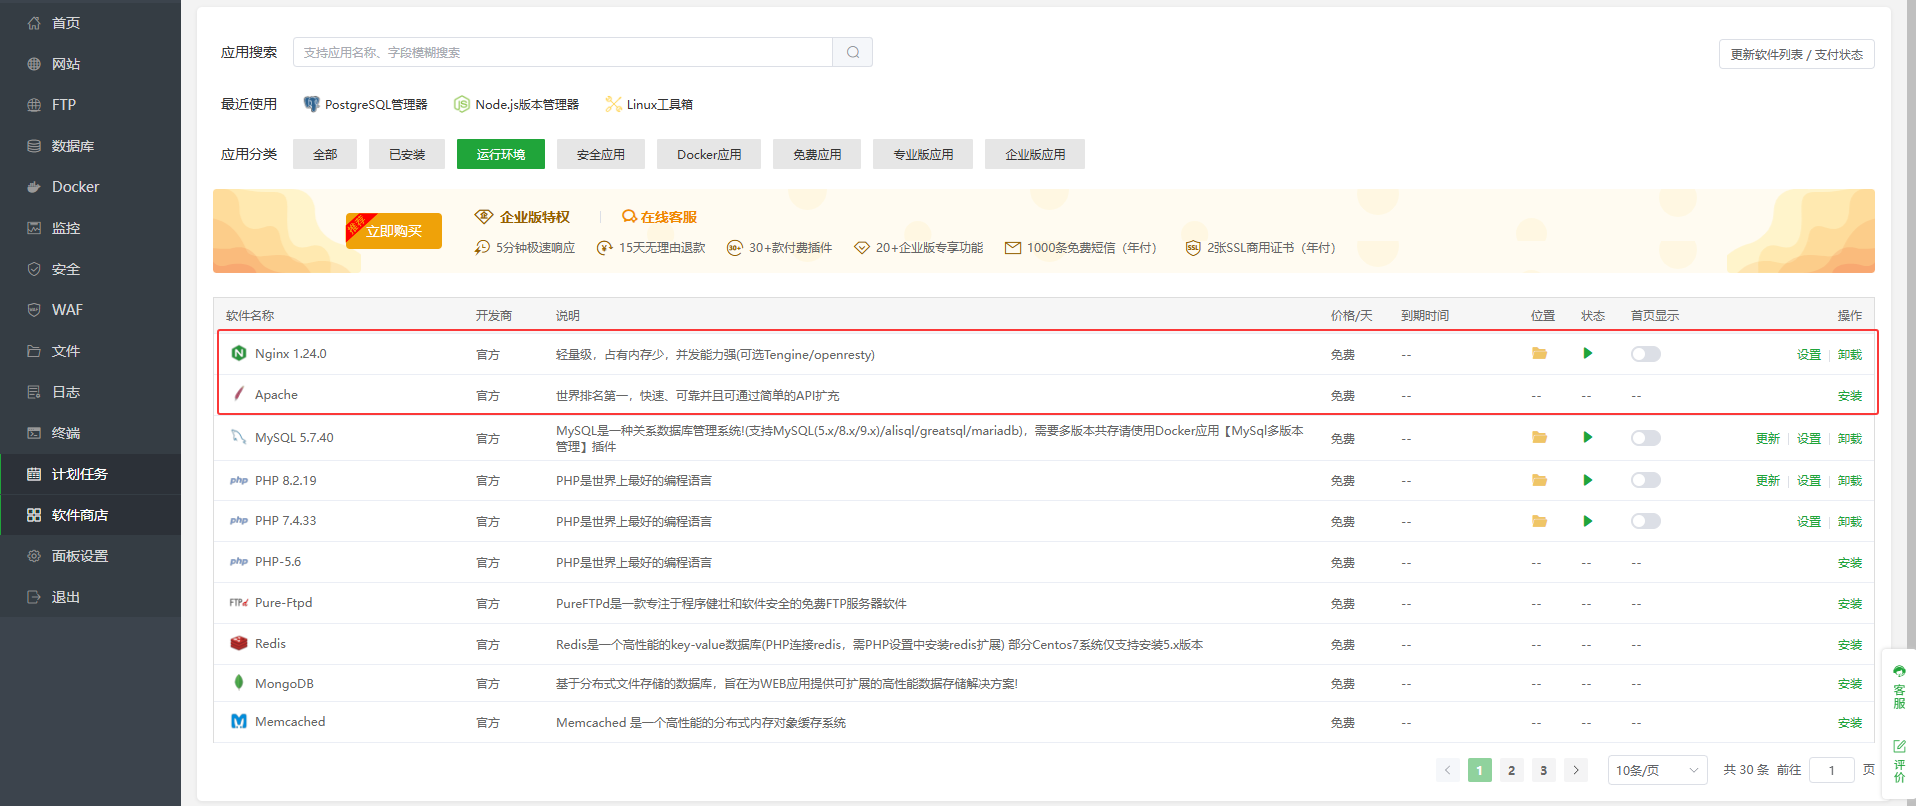
Note: If using Nginx, you need to configure rewrite rules.
# 3. Create a Website
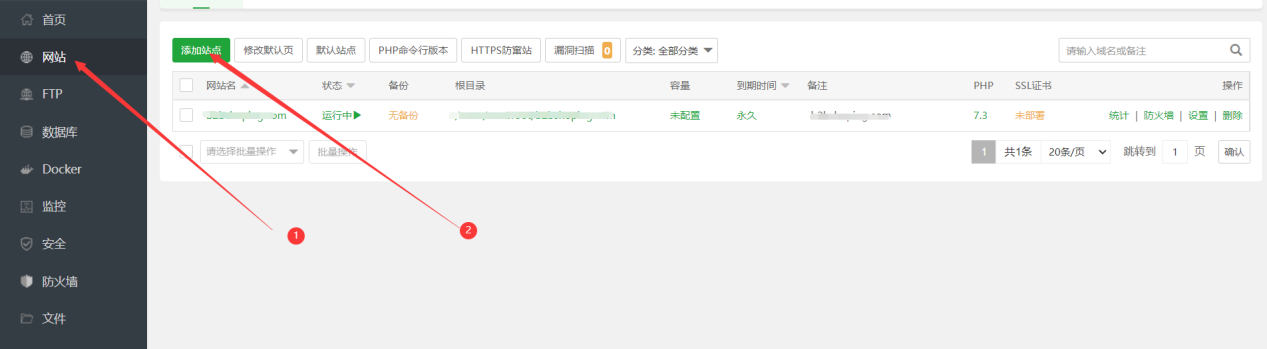
# 3.1. Create a Site
Click [the Website] menu in BTPanel -> then click [Add Site], as shown in the figure below:
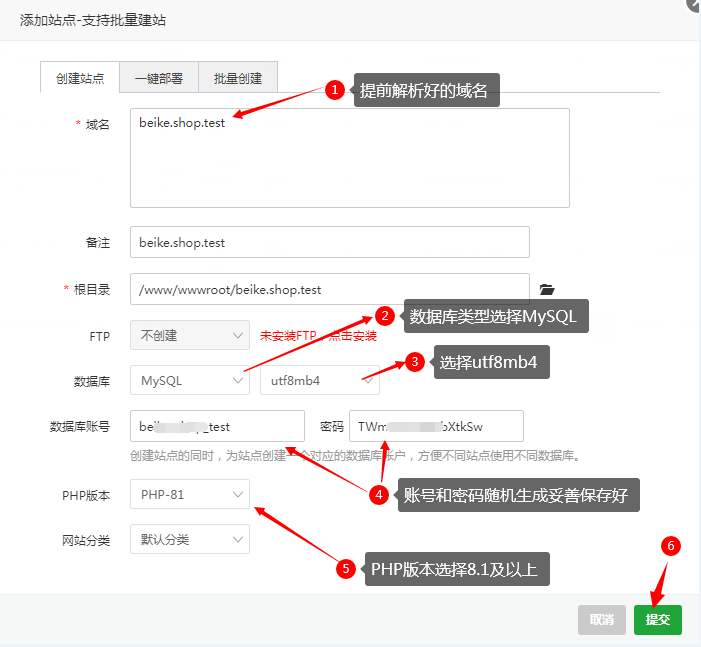
# 3.2. Add Domain and Create Database
Add your domain, create a database, and select the appropriate PHP version. Make sure the domain is already resolved to the corresponding server. If multiple database versions are installed, select at least version 5.7. The PHP version should be at least 8.2. After the site is successfully created, a popup will display the database name, username, and password—these will be used during system installation. As shown in the figure below:
# 3.3. Upload the Installation Package
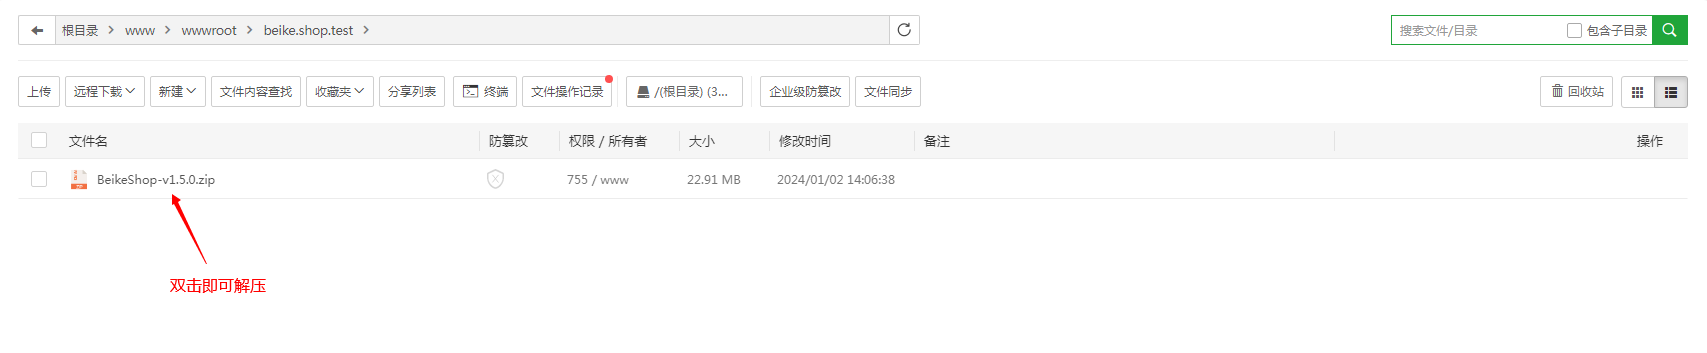
3.3.1. Upload the downloaded code archive to the root directory of the site and extract it. As shown in the figure below:

3.3.2. Click the Upload button, drag the downloaded code archive into the upload area, and then click the Upload button again to complete the upload. As shown in the figure below:
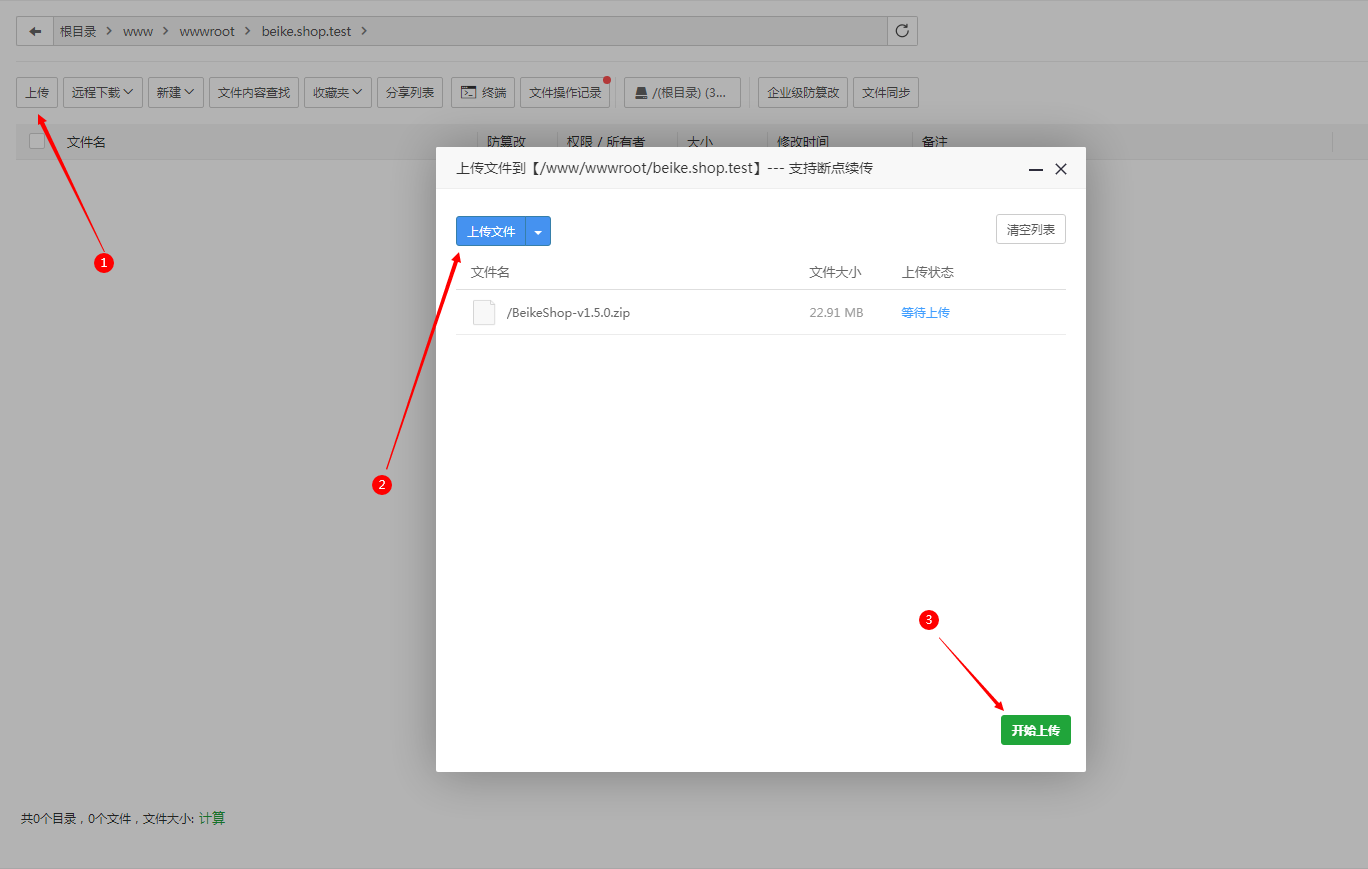
Double-click the uploaded code archive to extract it. As shown in the figure below:

# 3.4. Set Website Root Directory
Disable the cross-site attack prevention option and set the system’s root directory to the public folder (important).
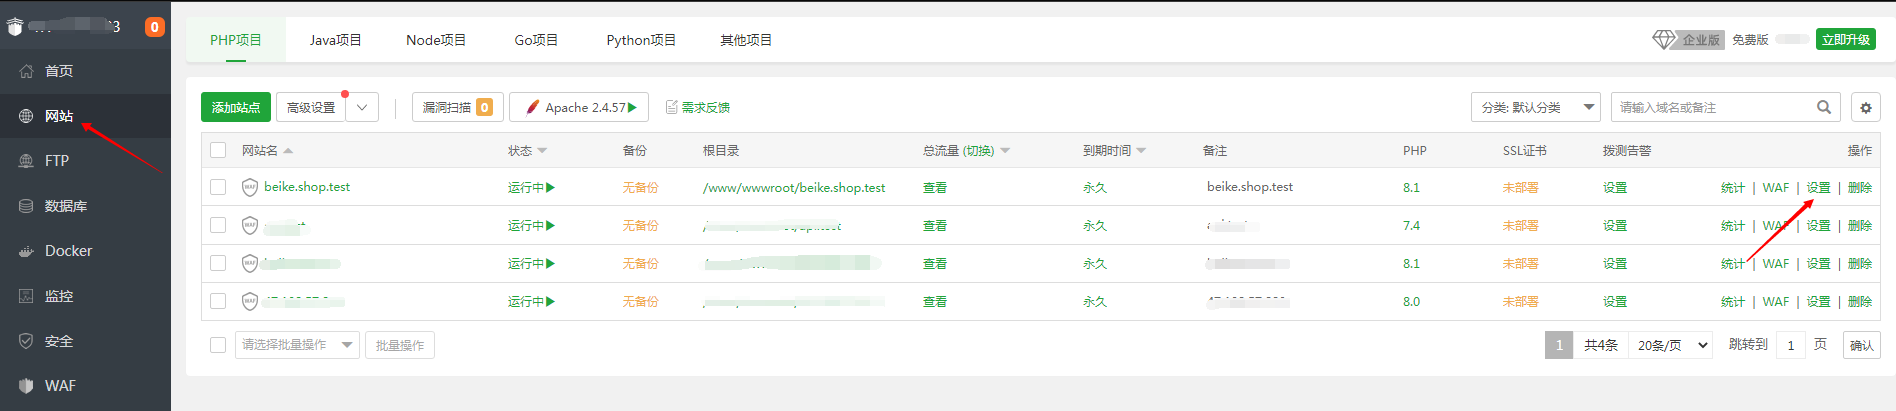
In the Baota Panel, click the Website menu -> find the site you created and click the Settings button. As shown in the figure below:
Locate the website directory and uncheck the Prevent Cross-Site Attack option. As shown in the figure below:
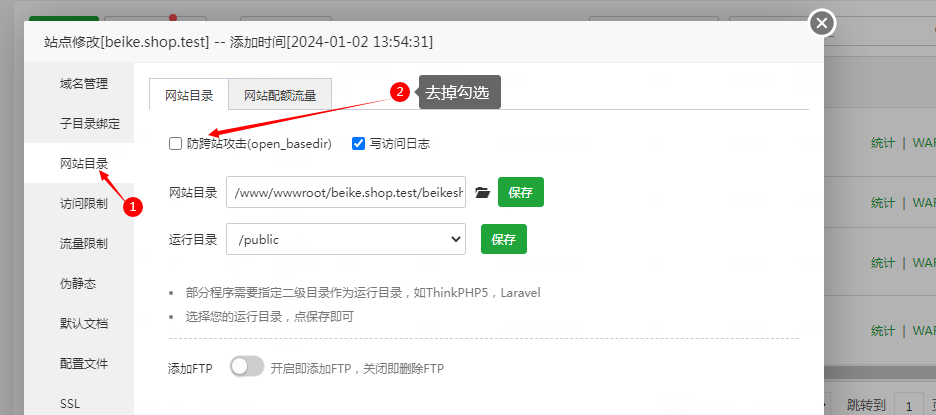
Set the system root directory to the public folder (IMPORTANT!!!) As shown in the figure below:
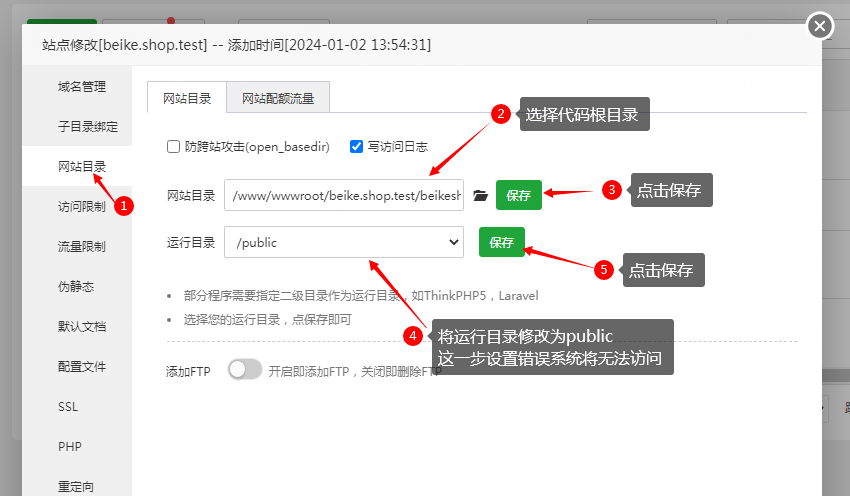
Website Directory:/www/wwwroot/beike.shop.test/beikeshop_v1.5.0
Root Directory: /public
TIP
If you need to use Nginx, make sure Nginx is installed in advance. You can refer to the PHP installation method for guidance.
# 3.5. Configure Rewrite Rules(Nginx)
Unlike Apache, Nginx requires configuring rewrite rules.
In Baota Panel, go to Website Settings → Rewrite Rules, and add the following code.
location / {

 try_files $uri $uri/ /index.php?$query_string;

}

# 4. System Installation
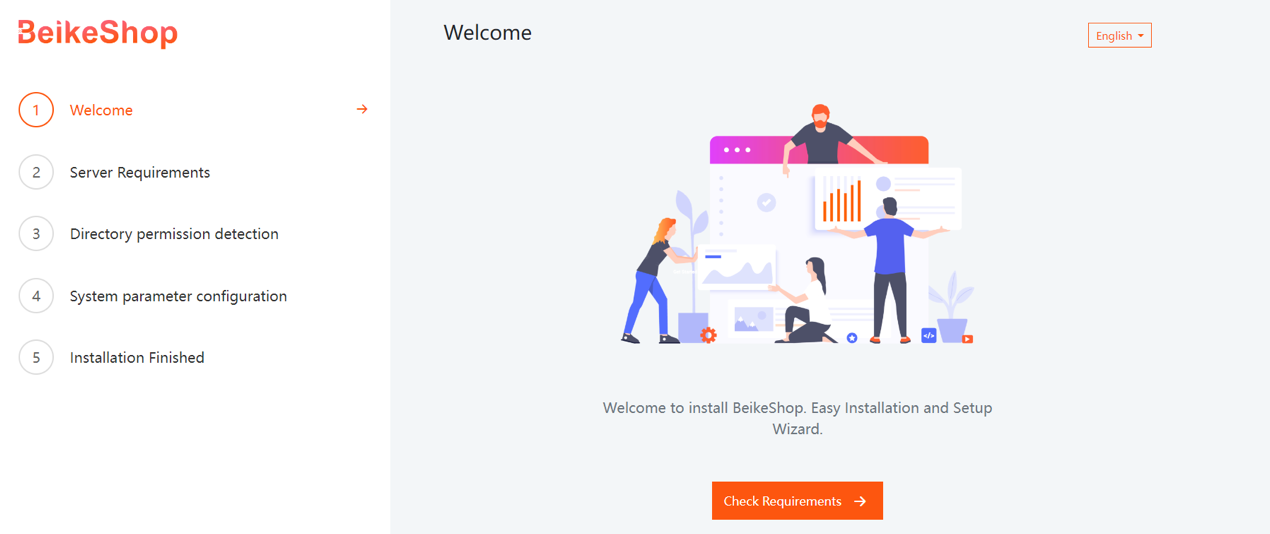
Enter the domain beike.shop.test in your browser. If the page shown in the figure appears, you have successfully accessed the installation page.
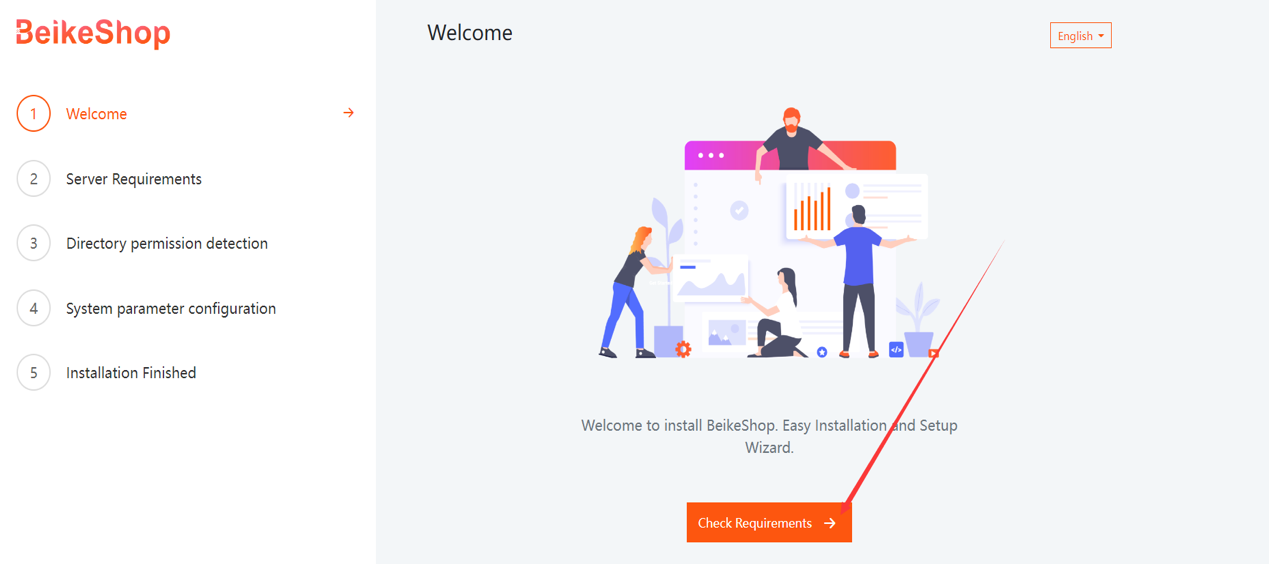
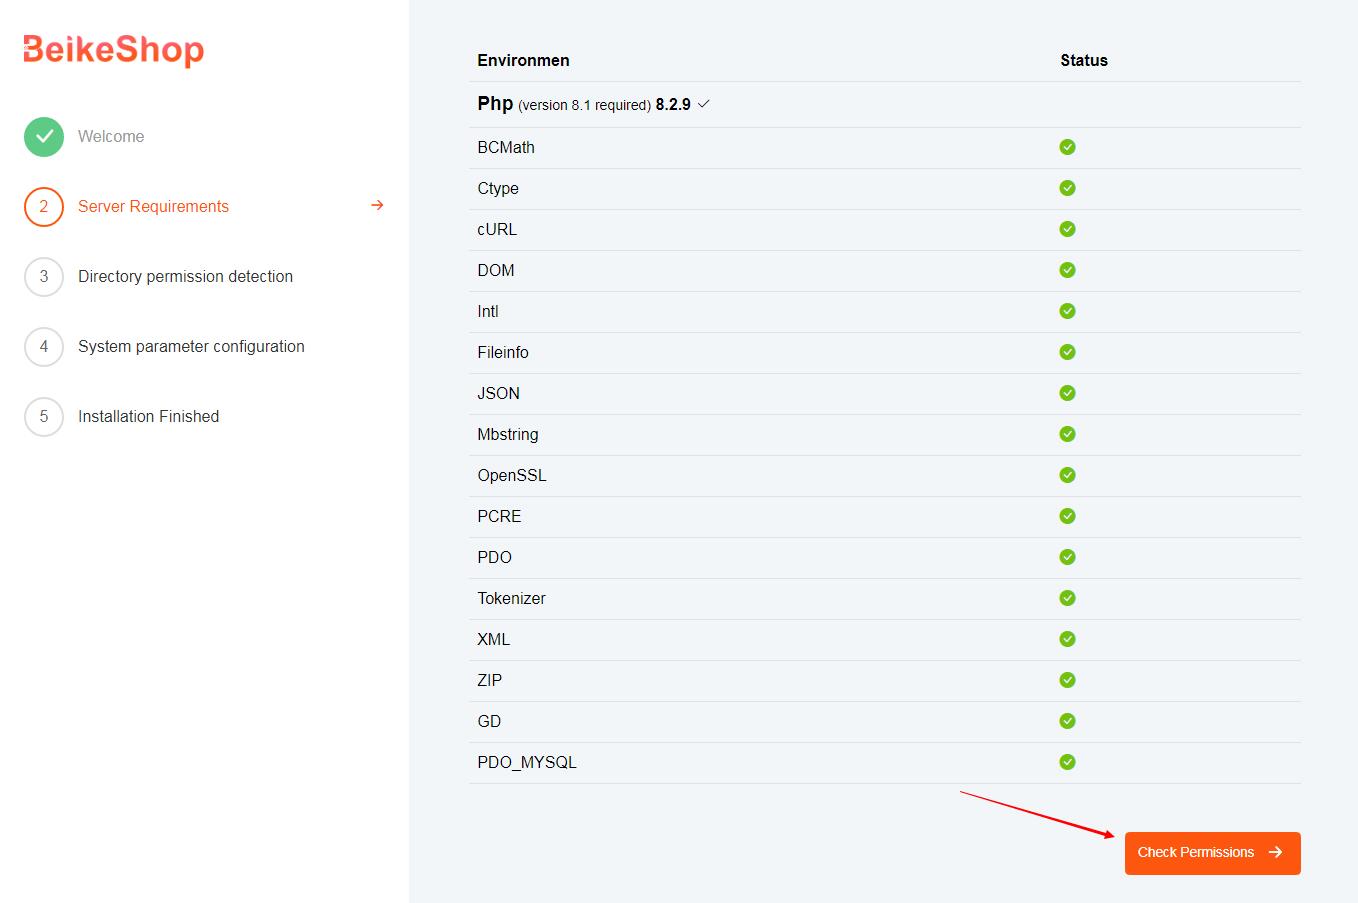
Click the buttons in order: Check Requirements, Check Permissions, Configure Environment, and finally Installation Finished to complete the process.
Step 1: Installation Interface
Step 2: Environment Check
Step 3: Directory Permissions Check
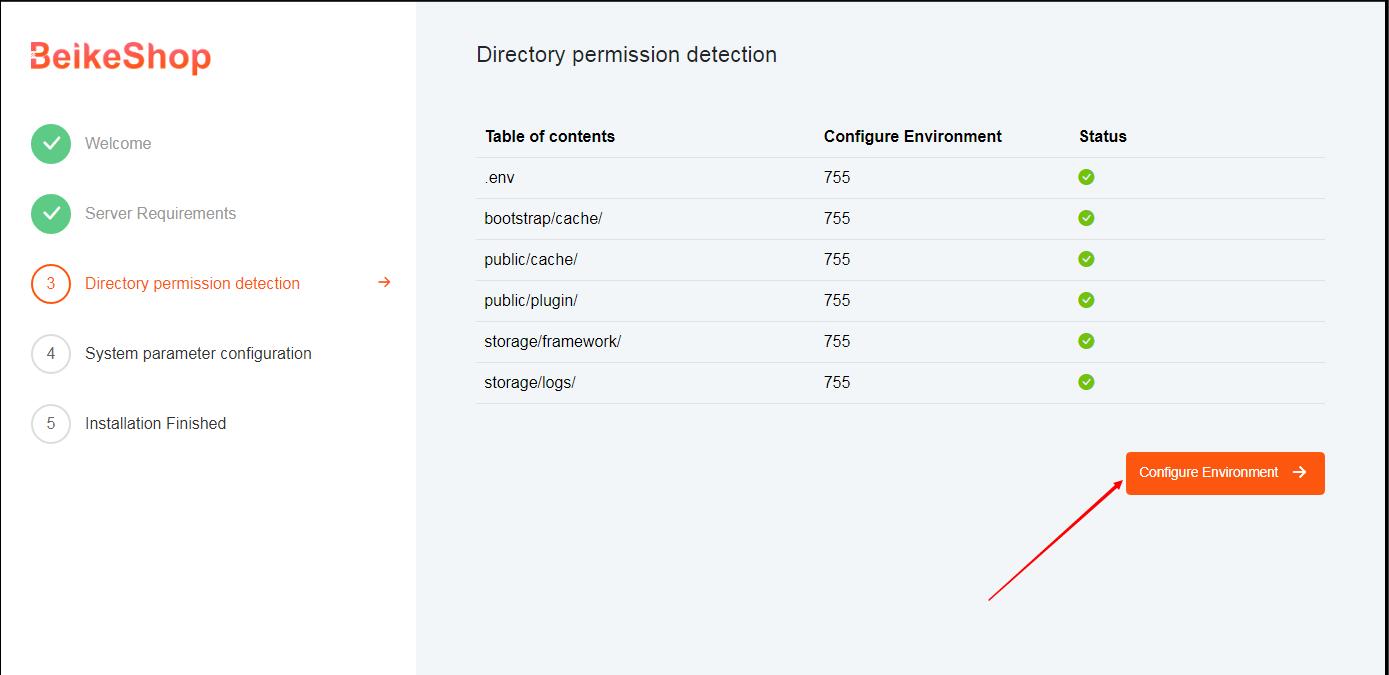
Step 4: Fill in the database and admin login information, then click the Install button
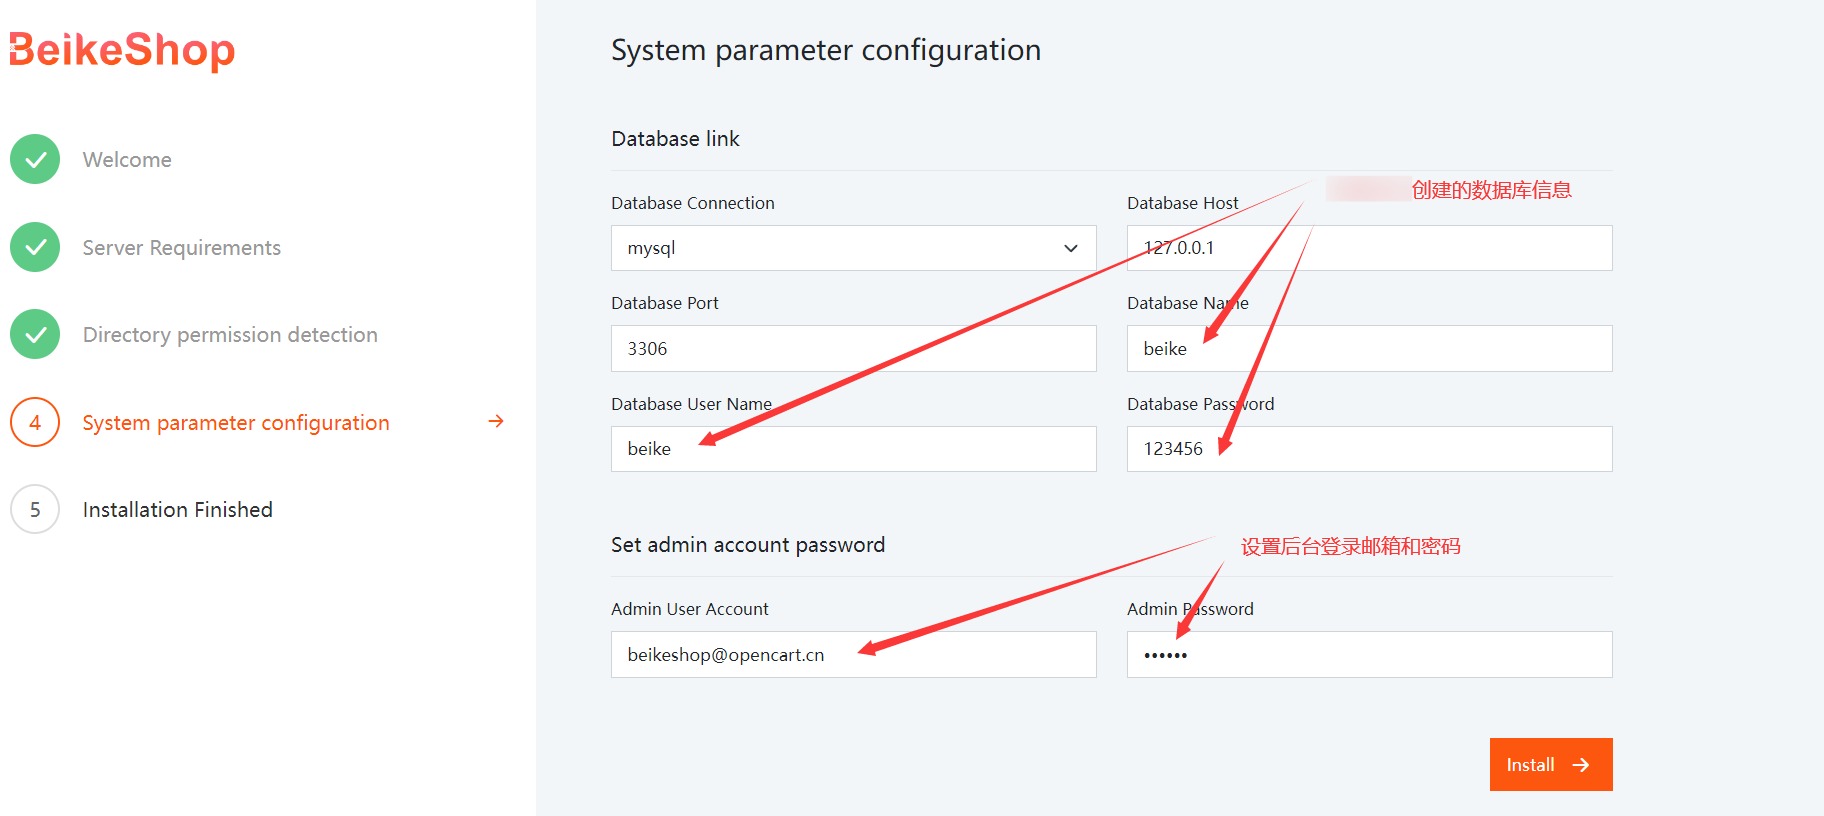
Note: The field "Set admin account password" will only appear after the system successfully verifies the Database information.
Step 5: Installation successful. If the page shown in the figure appears, the installation has been completed successfully.
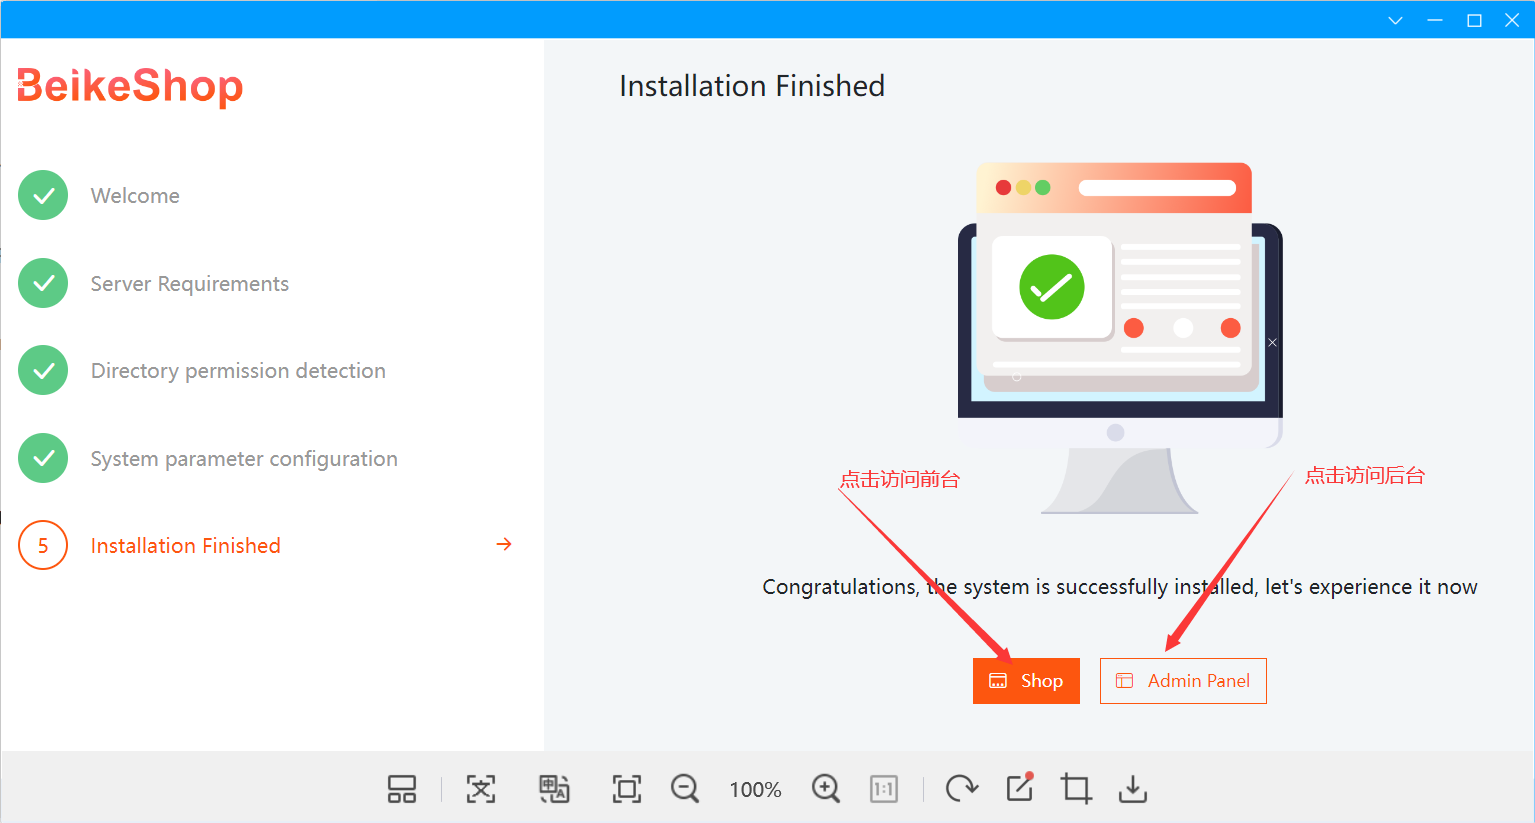
# 5. Shopping Mall Interface
Frontend Interface

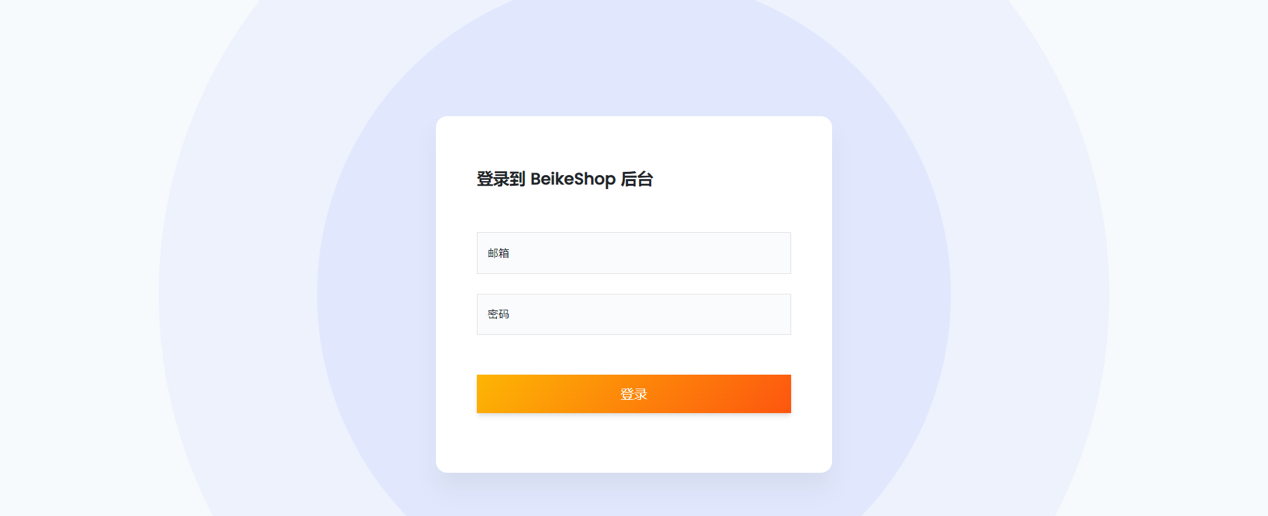
Backend Interface
TIP
This concludes the BeikeShop installation tutorial based on CentOS 8.5 + Baota Panel. You can now start using the system!
For any other questions, please contact marketing@guangda.work / QQ: 9358972
Chengdu Guangda Network Technology Co., Ltd. All rights reserved.
For common issues during the installation process, please refer to: FAQ– Installation Issues
# Troubleshooting
Disabled Functions Error: This is the most common reason for deployment failure. You must find the
disable_functionslist inphp.ini, manually removeputenvandproc_open, and restart the PHP service.404 Error / Route Failure: Usually due to unconfigured URL rewriting or the running directory not pointing to
/public.Missing vendor/autoload.php: Indicates that Composer dependencies have not been downloaded. Please confirm that
composer installhas been executed.Internal Server Error (500): Check if
/public/.htaccessexists and is complete (you can re-copy it from the installation package).
# Apache
Ensure that the mod_rewrite module is enabled on the server and check the .htaccess rules in the project root directory.
← Requirements XPanel →