# Hook Mechanism
# Hook Description
BeikeShop uses a hook mechanism similar to WordPress, including filter, action and blade. Generally, hook is used with plugin.
During the life cycle of visiting any page of BeikeShop, the system provides a hook_filter and hook_action function to perform some additional operations.
hook_action is used to execute additional functions, while hook_filter is used to process the output content. Each specific hook has a predefined name, such as the hook of the product data of the product details page is called product.show.data.
When the BeikeShop system is initialized, the plug-in can register its own processing function to the hook with a specific name using add_hook_filter or add_hook_action. When the page executes hook_filter
or hook_action
, the corresponding processing function will be called.
BeikeShop has set default processing functions in many hook positions. If you find that a certain place needs to be modified but there is no suitable place to inject or modify it, you can contact us or submit a PR.
In addition, blade hook means that blade template can be modified in the plugin, of course, the premise is that @hook or @hookwrapper has been defined in the corresponding blade template
# Hook Classification
# 1. Data Hook: add_hook_filter
- The corresponding tracking method in the system: hook_filter, you can ignore this method.
- This hook is mainly used to modify the data returned by a specific method in the system, and the modified data will be returned to the system for use, such as the data on the front-end product details page and the back-end top navigation menu. Usage example:
// Add a link menu to the homepage header
add_hook_filter('menu.content', function ($data) {
    $data[] = [
        'name' => 'Added Google menu',
        'link' => 'https://www.google.com',
    ];
    return $data;
}, 0);
# 2. Process Hook: add_hook_action
- The corresponding tracking method in the system: hook_action, you can ignore this method.
- This hook is mainly used to modify the process, such as pushing the order to other ERP systems after it is successfully placed.
add_hook_action('checkout.order.confirm.after', function ($data) {
    dump($data);
    // This can be pushed to your ERP system
}, 0);
# 3. Template Hook: add_hook_blade
- The method of embedding points in blade templates in the system:
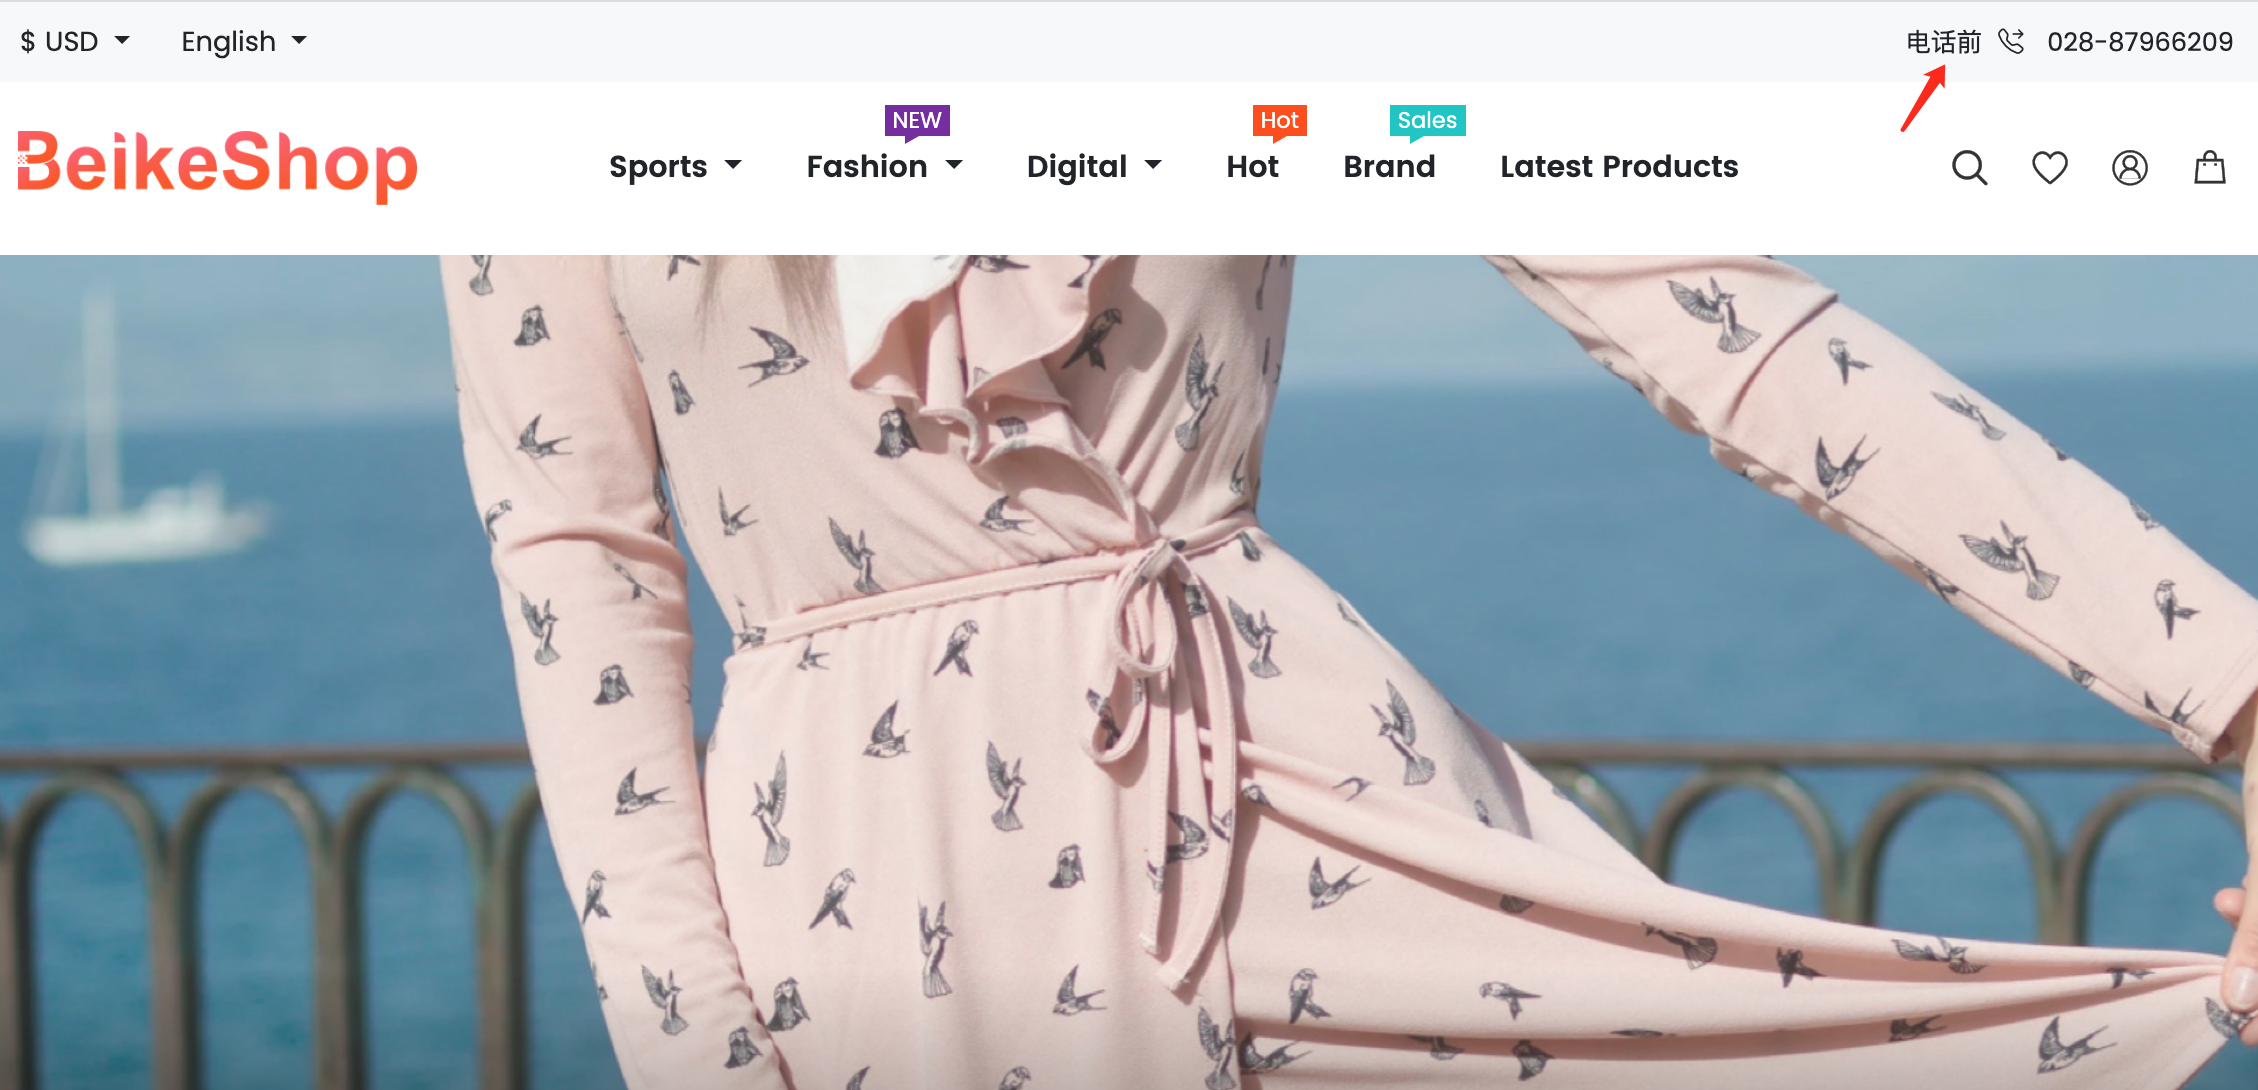
@hookor@hookwrapper/@endhookwrapper, you can ignore these two tags. - This hook is used to modify the blade template, for example, add a sentence before the phone number at the top of the front desk as follows:
hookwrapperhas been pre-buried in the system/themes/default/layout/header.blade.php:
<div class="right nav">
    @hookwrapper('header.top.telephone')
    <span class="px-2"><i class="bi bi-telephone-forward me-2"></i> {{ system_setting('base.telephone') }}</span>
    @endhookwrapper
</div>
- Add the following code to your plugin:
add_hook_blade('header.top.telephone', function ($callback, $output, $data) {
    return 'Before the phone' . $output;
});
- The effect is as follows:

# Hook Naming Conventions
TIP
Modules generally correspond to class names, and operations are class methods.
# Front Desk Filter
- Controller: hook_filter(module.operation.data)
- Repository: hook_filter(repo.module.operation.data)
- Service: hook_filter(service.module.operation.data)
# Front-end Action
- Controller: hook_action(module.action.before|after)
- Repository: hook_action(repo.module.action.before|after)
- Service: hook_action(service.module.action.before|after)
# Front-end Blade
- @hook
- @hook('module.page.page logo.before|after|left|right'), for example @hook('product.detail.buy.after')
- @hookwrapper
- @hookwrapper('module.page.page logo'), for example @hookwrapper('header.top.currency')
# Backstage Filter|Action|Blade
Add admin in front of the front-end rules.
# Hook Usage
Create a Bootstrap class in the plugin root directory (file name Bootstrap.php), the code is as follows:
namespace Plugin\The name of your plugin directory;

class Bootstrap
{
    public function boot()
    {
        // Here, use add_hook_filter, add_hook_action or add_hook_blade methods to modify system data, processes or pages
        // For example, one of the three hook instances above
        add_hook_blade('header.top.telephone', function ($callback, $output, $data) {
            return 'Before the call' . $output . 'After the call';
        });
    }
}
# Example explanation
For example, we want to add a prefix - Crazy Hot Sale to the product name on the product details page. The steps are as follows:
# 1. New plugin
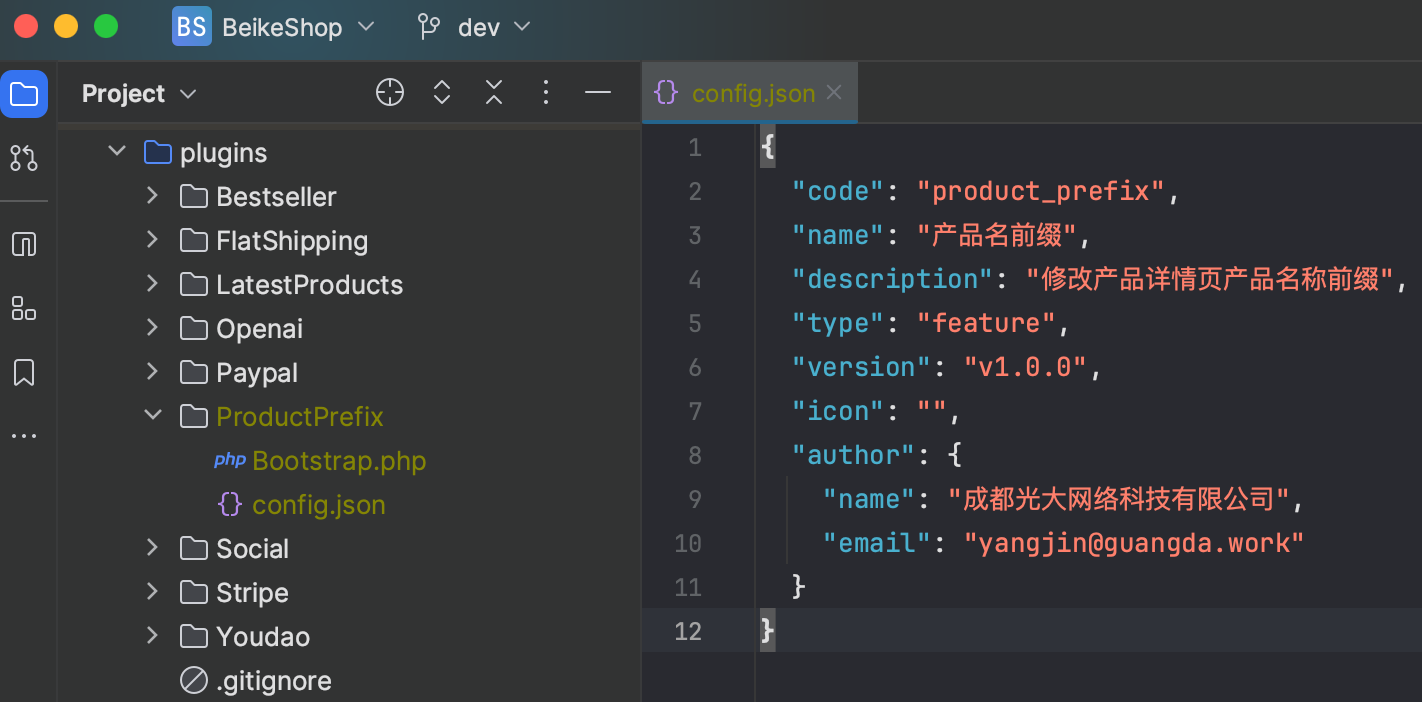
Create a folder called ProductPrefix, and create two files: config.json and Bootstrap.php

The basic information of the plugin config.json is as follows, you can also modify it according to your own ideas
【Note: the code cannot be the same as the online plugin, otherwise an error message will be reported when uploading the plugin configuration:This plugin is not authorized. Please purchase it in the plugin market.】
{
  "code": "product_prefix",
  "name": "产品名前缀",
  "description": "修改产品详情页产品名称前缀",
  "type": "feature",
  "version": "v1.0.0",
  "icon": "",
  "author": {
    "name": "成都光大网络科技有限公司",
    "email": "[email protected]"
  }
}
Type indicates the plug-in type. Currently, there are 8 predefined types in the system, which are:
[
        'payment',    // Payment Methods
        'shipping',   // Delivery method
        'theme', // theme template
        'feature', // feature module
        'total', // order amount
        'social', // social network
        'language', // language translation
        'translator', // translation tool
]
The content of the startup file Bootstrap.php is as follows
<?php
/**
 * bootstrap.php
 *
 * @copyright  2022 beikeshop.com - All Rights Reserved
 * @link       https://beikeshop.com
 * @author     Edward Yang <[email protected]>
 * @created    2022-07-20 15:35:59
 * @modified   2022-07-20 15:35:59
 */

namespace Plugin\ProductPrefix;

class Bootstrap
{
    public function boot()
    {
        // Modify the product name on the product details page through data hook
        add_hook_filter('product.show.data', function ($product) {
            $product['product']['name'] = '[疯狂热销]'. $product['product']['name'];
            return $product;
        });

        // Modify the blade template of the product details page and add a button after the buy now
        add_hook_blade('product.detail.buy.after', function ($callback, $output, $data) {
            $view = '<button class="btn btn-dark ms-3 fw-bold"><i class="bi bi-bag-fill me-1"></i>新增按钮</button>';
            return $output . $view;
        });
    }
}
# 2. Go to the backend to install and enable the plug-in
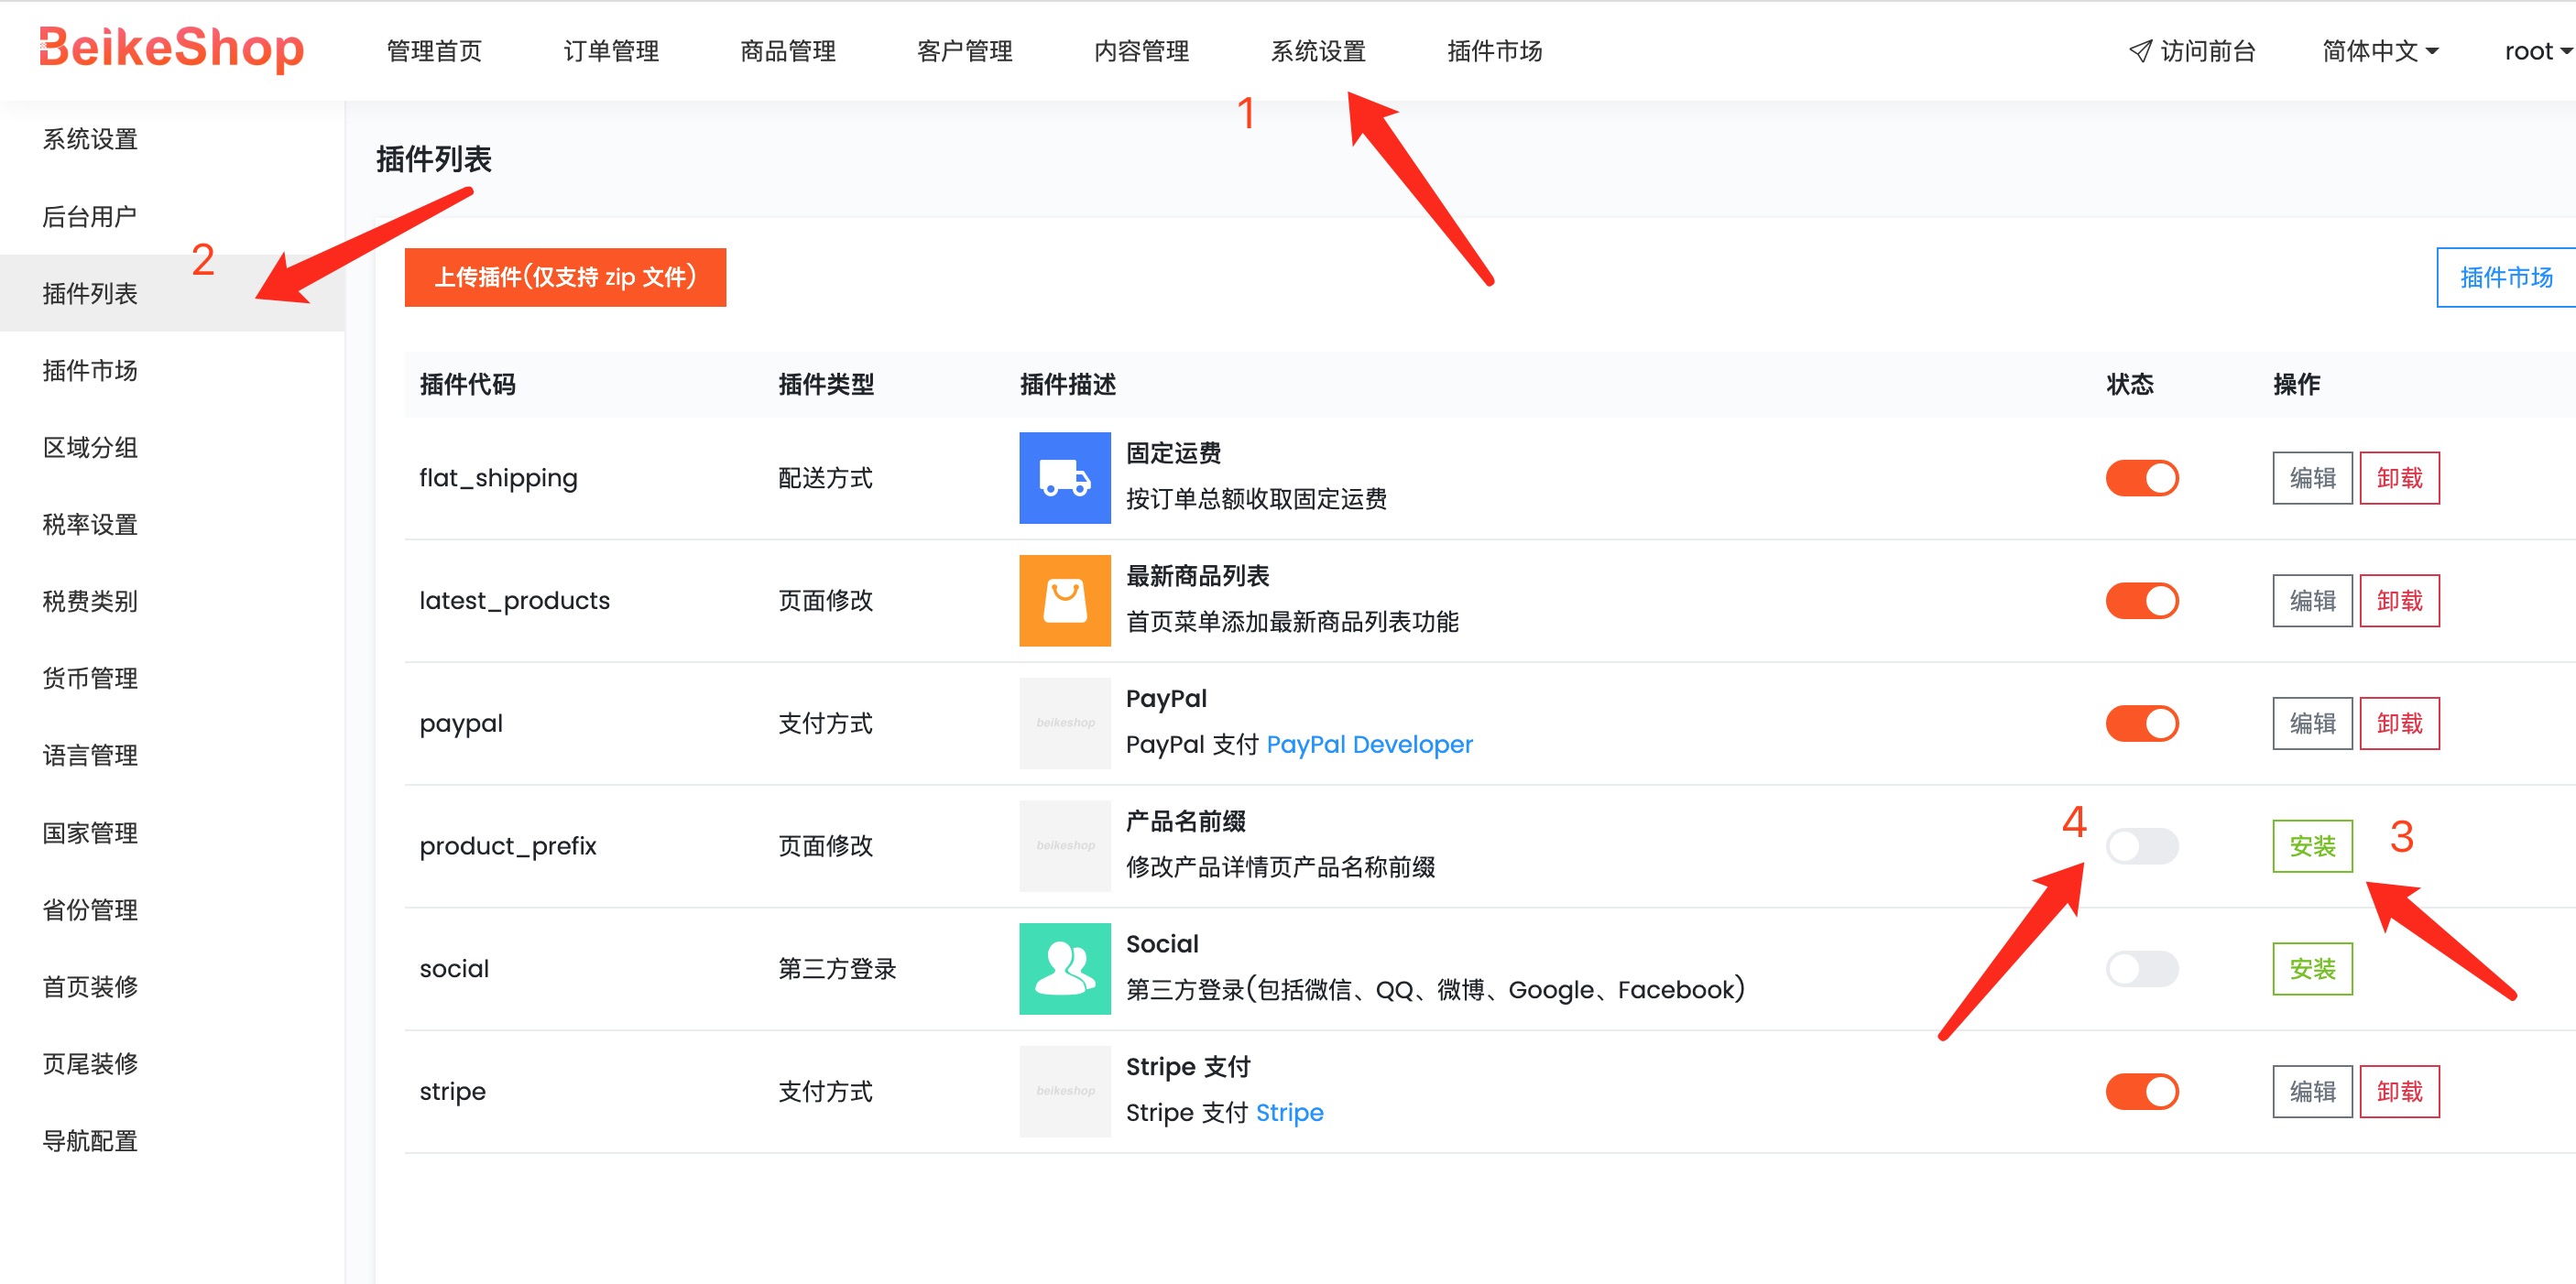
Click System Settings - Plugin List - Install - Enable

# 3. View product details
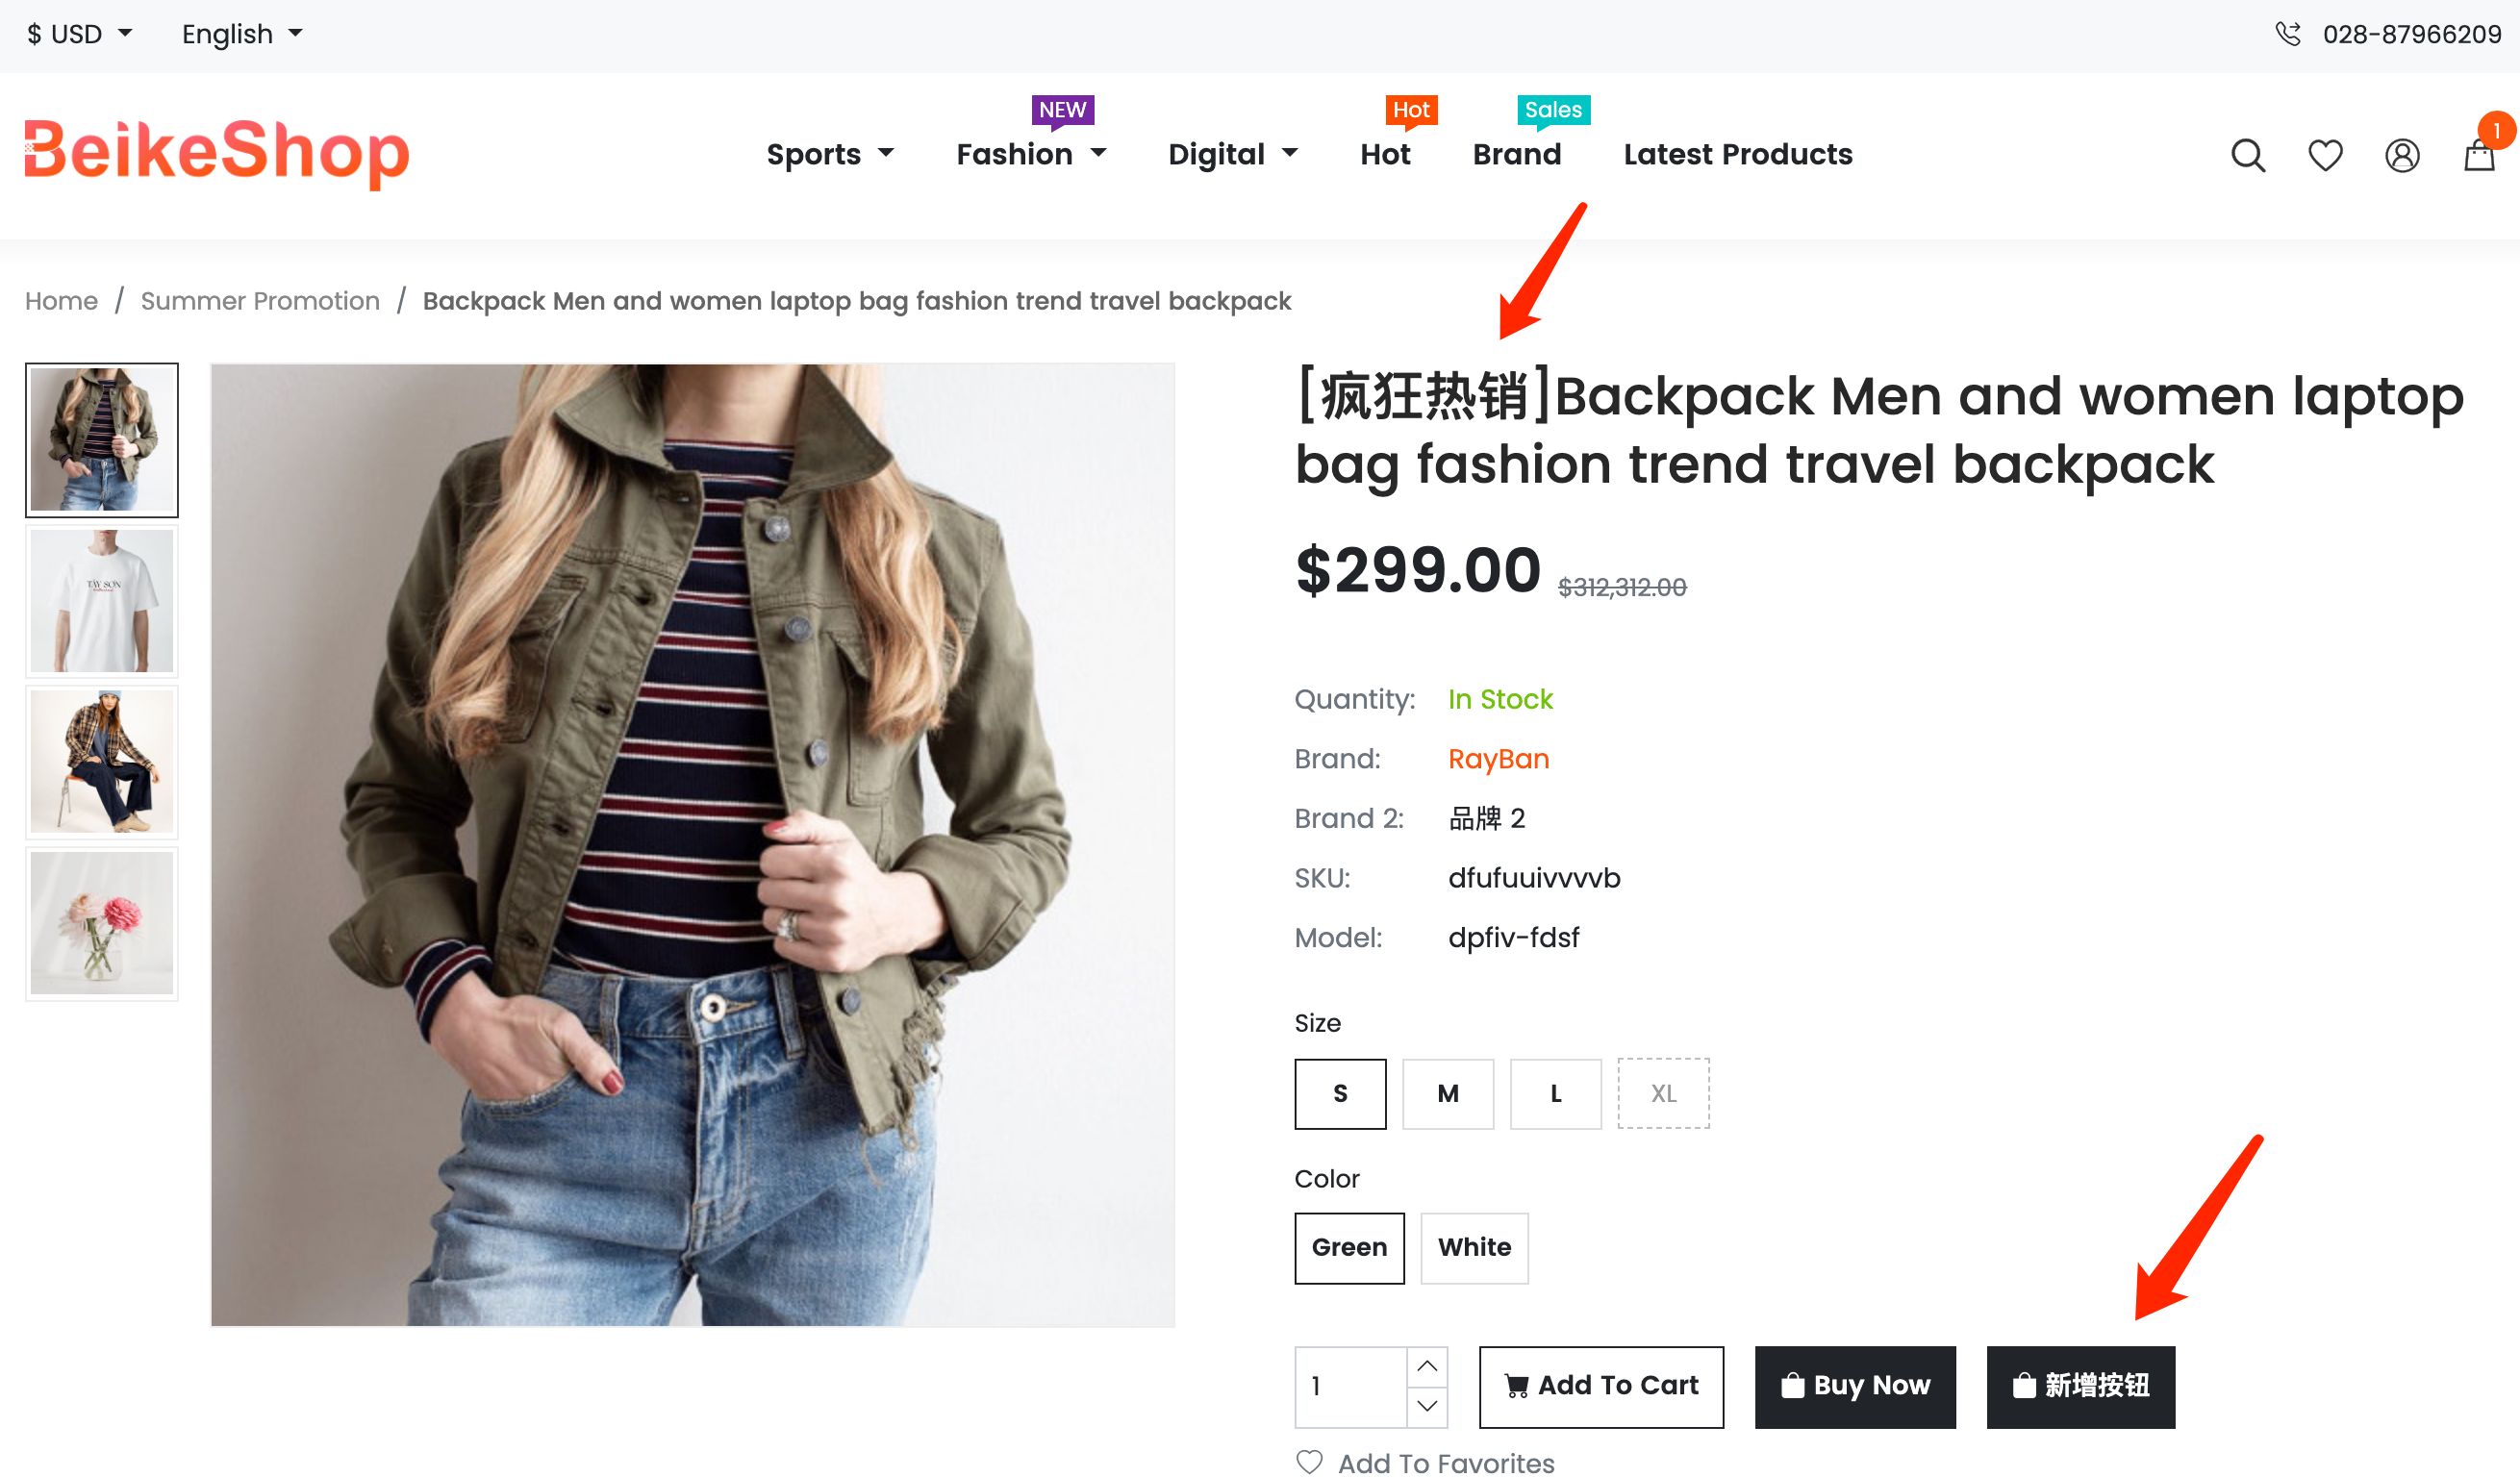
As you can see, the product name is prefixed with [Hot Sale], and a Add button is added after the Buy Now button.

In this way, we modified the product name on the product details page and added a button without changing the core code.